The Little Red Beast
Go to the latest update!
I took delivery of my Rubicon in December of 2016. It is a JKUR (JK Unlimited Rubicon) with the Hard Rock package, which basically means it has Dana 44 axles with electric lockers at both ends, a powered swaybar disconnect, an upgrade transfer case (the NV-241 "Rock-Trac" case has a 4:1 reduction instead of the Command-Trac's 2.72:1), NSG370 six speed manual transmission, all powered by the 3.6L Pentastar V-6 engine. It came from the factory on 32 inch BF Goodrich Mud-Terrain tires on 17 inch wheels, which suited me just fine.
It's a hard top, but the top can be removed in pieces. Called the "freedom top," there are two panels above the front seats that can be removed to let the occupants of those seats enjoy the sun and sky. It is possible to remove the entire top of the vehicle, but as I have in the past found myself above twelve thousand feet in an August snow storm, or driven all night through the mountains in driving rain, I was not inclined towards the rag top. I've taken a lot of flak from well-meaning buddies about that, but hey ... it's my comfort we're talking about, right?
Inside there is the optional 9-speaker plus subwoofer Alpine Audio Package, connected to the standard AM / FM / CD player. Yep, you read that right, no fancy flat screen interactive navigation system for me. I grew up with maps and a compass, and after the technology was developed treated myself to a damn good handheld GPS receiver (a Garmin GPSMAP64st with some added goodies), so I figured that the in-dash nav display, et. al., would just be one more thing that would need fixin' down the trail. I can connect my phone or iTouch to the U-Connect system in the standard radio receiver and hear all my tunes, all the time, with superior sound. Perfect.
The interior was a pleasant surprise, I didn't realize that the Hard Rock package included black leather seats (with seat-warmers!) and black carpet upholstery. Even so, knowing where this Jeep would go and assuming I'd discover a lot more trails in the process, one of the first things I did was get a nice set of "Saddle Blanket" seat covers from ShearComfort Seat Covers in Vancouver, British Columbia, Canada. I wanted to protect those nice leather seats, and the Saddle Blankets have taken everything I can throw at them so far and have hung tough.
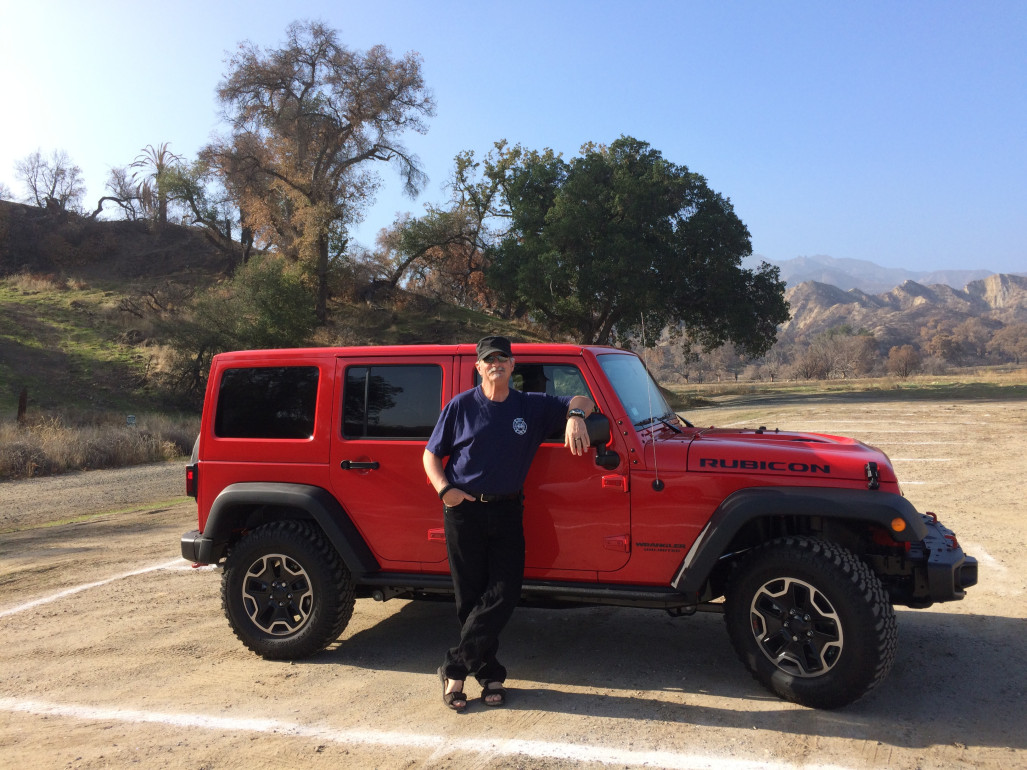
Sunday, 11 December, 2016. Brand new. Even the wheel wells and frame rails are shiny ...
![]()
But as any Jeep owner will tell you, one must personalize their rig.
Here's how I've done mine, so far:
3 May 2017
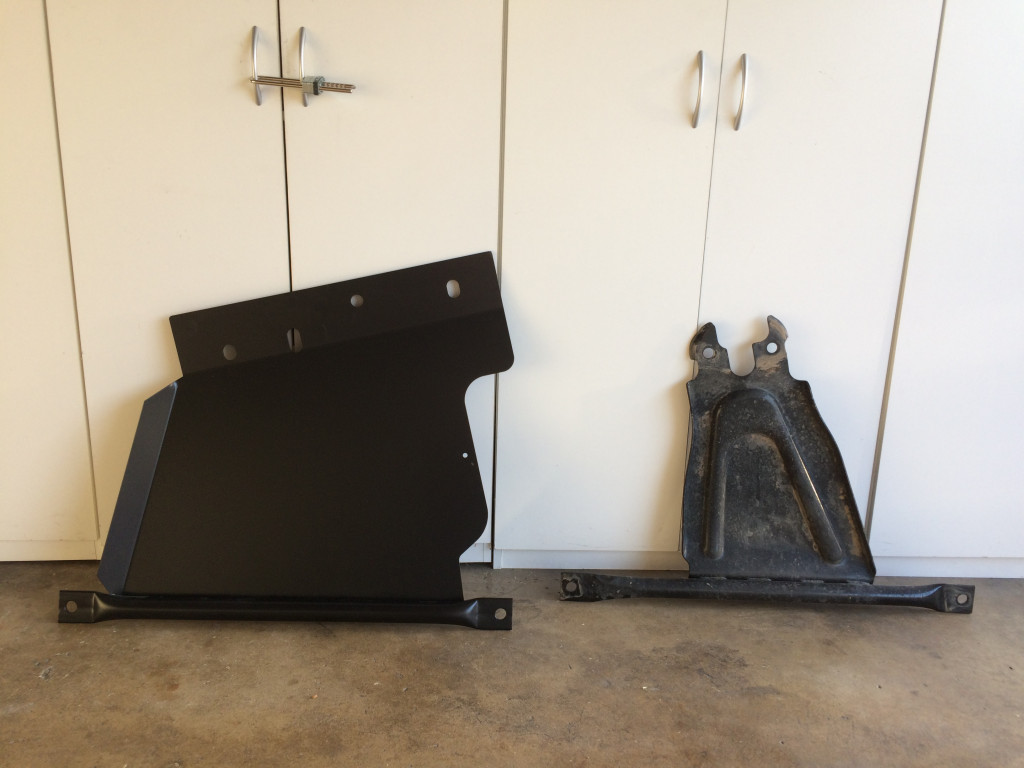
The very first thing I wanted to do was get some real armor between me and the rocks. To this end a full set of Rock Hard 4X4 skid plates seemed to be just the right thing for me and the LRB. As mine is an Unlimited (4 door model), I needed a bit more than than the 2-door rigs do, most of the extra covering the fuel tank. Above is a visual comparison between the factory skid plat that protects the transfer case (right), and the Rock Hard 4X4 product (RH-6004). The stock unit is cast aluminum. The aftermarket unit is 3/16-inch, laser-cut plate steel, CNC bent and jig-welded.
Note that there is no factory skid plate protecting the engine or transmission!
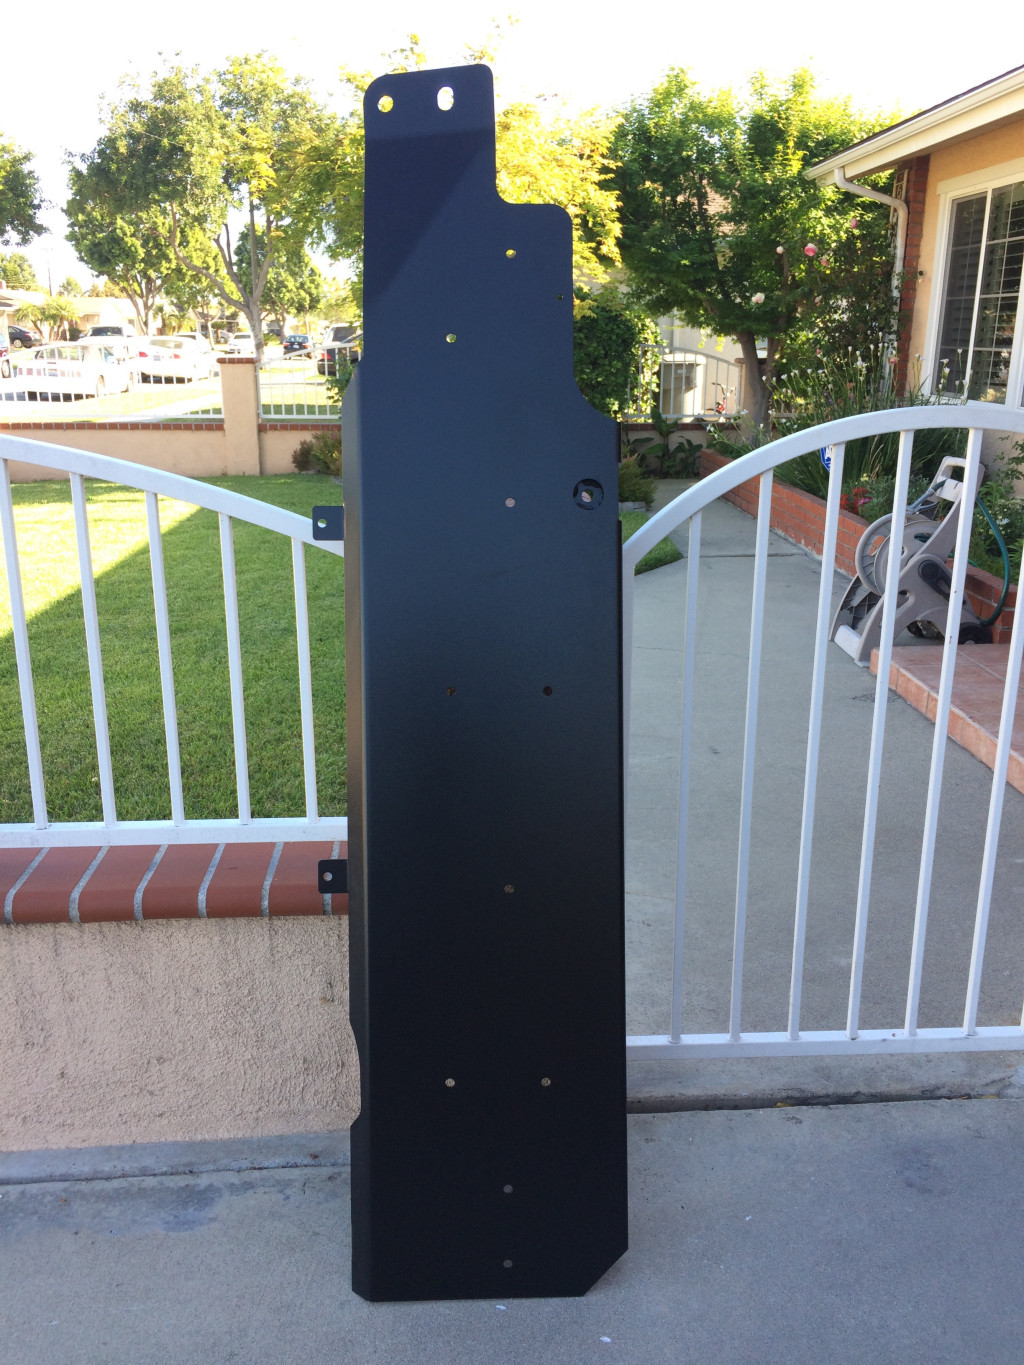
Below is the Rock Hard 4X4 fuel tank skid plate (RH-6001). This does not replace the stock unit, but rather fits over it. Together the two provide 1/4 inch of plate steel protection for your fuel supply. It is also 3/16-inch, laser-cut plate steel, CNC bent and jig-welded.
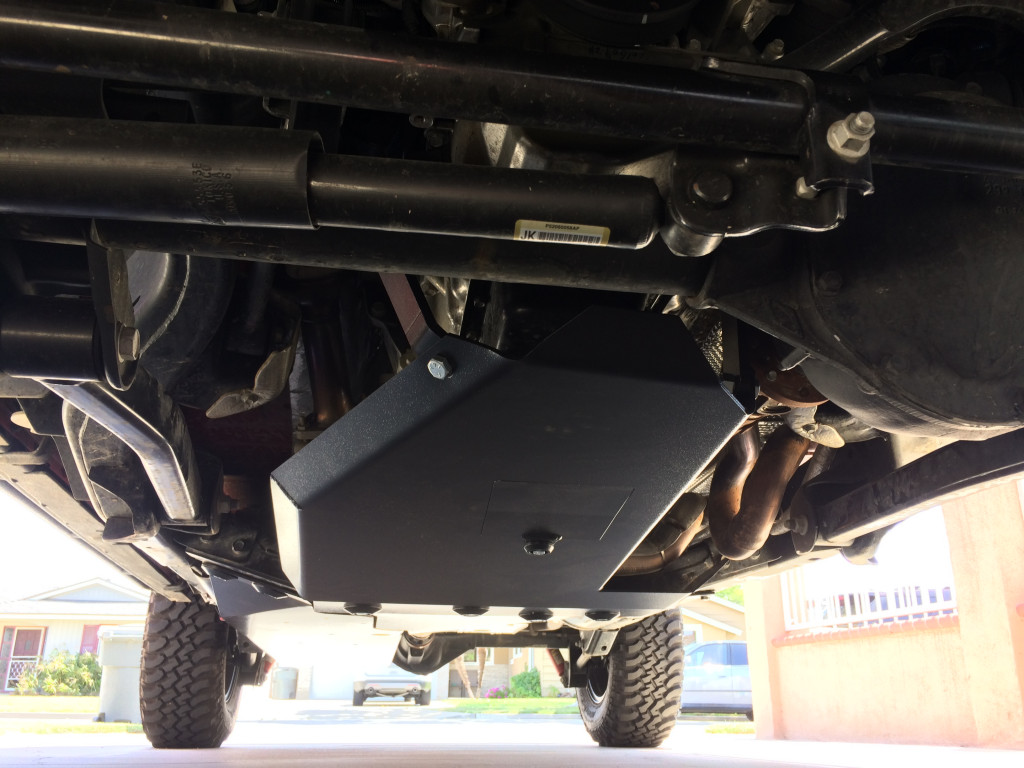
Above, we are looking aft from beneath the front bumper at the installed Rock Hard 4X4 engine / transmission skid plate (RH-6003). It is made from the same 3/16-inch, laser-cut plate steel, CNC bent and jig-welded. Note the door providing access to the drain plug for the transmission. Note also the "Rock Dome" protective bolt head protectors attaching the engine / transmission and transfer case skid plates to the cross member. They help deflect terra firma over the bolt head, instead of letting it crash into the bolt head. Nice touch!
Below we are looking forward from beneath the rear bumper at the fuel tank skid plate (right) and the transfer case skid plate (beyond).
I purchased all these items from 4-Wheel Parts in Santa Ana. Check their web site for information, just search on the Rock Hard 4X4 part numbers.
12 February 2018
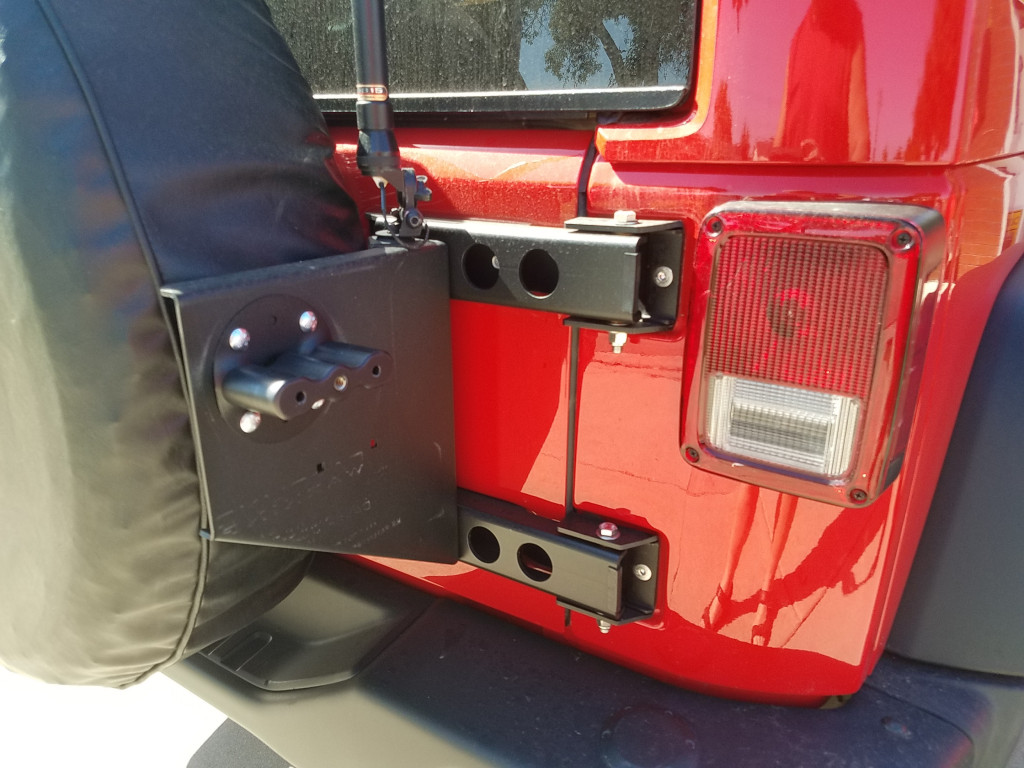
So once I got comfortable with protection from below, I went out back. To the tailgate! Someone I work with had experienced some issues with the tailgate hinges on his JK failing after he mounted a 37 inch wheel and tire assembly on an aftermarket spare tire mount using factory mounting points on the original tailgate. Long story short, he pointed me to the MorRyde JP54-003 Tailgate Hinge Kit. These steel hinges replace the stock hinges easily. Not only are they much stronger, but the pivot point of the hinge has a zerk grease fitting. Lube it every now and then, and these hinges should carry the load and outlast the tailgate they support. I bought mine from RetroFit Offroad.
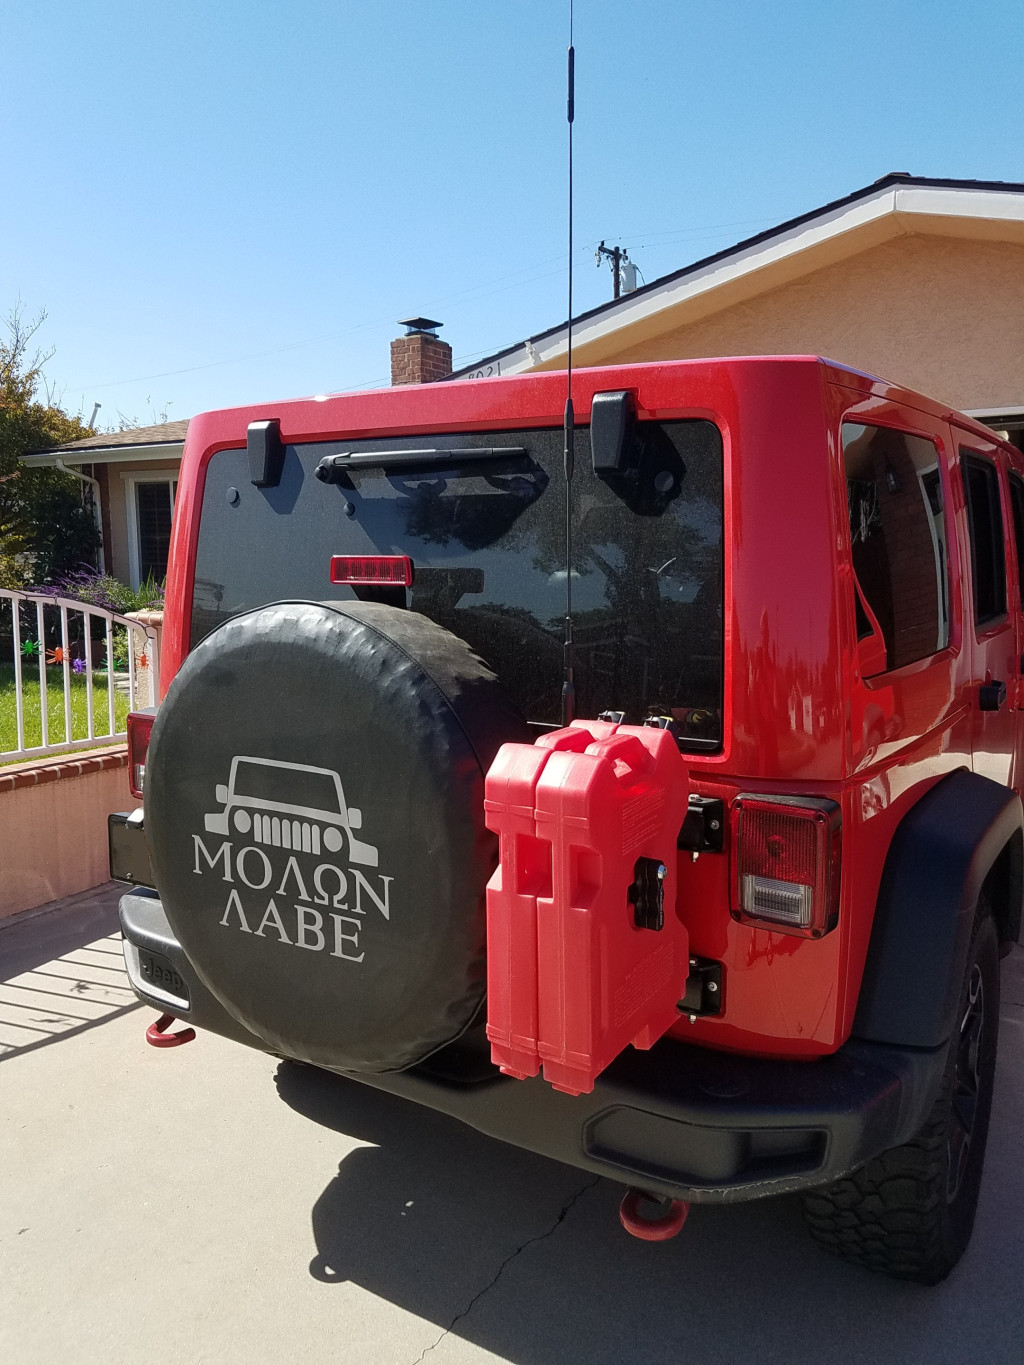
The angular plate hanging beside the spare tire is also a MorRyde product, their JP54-012 Hinge Mount RotoPax Carrier. My JK has a 22.5 gallon gas tank, but having a little extra fuel along can't hurt, right? This carrier allows me to carry two 2-gallon RotoPax gas cans out back. Helpful if your fun begins to outlast the on board fuel supply. And the carrier has a handy location for an antenna mount for a two-way radio system.
Below is the completed installation with the RotoPax cans mounted. A word of warning: If you mount two cans like I did (instead of just one like the manufacturer's picture shows), clearances will be very tight between the cans in place and the right side tail light lens when the tailgate door is fully open. If you, or the wind, throw your tailgate door open, you'll likely crack your tail light lens. I've done it.
But wait ...

25 January 2019
This tail light issue was apparently bothering me enough that I was grumbling to my son about it. He and his wife decided that I had grumbled enough, so they bought me a Christmas present: a Warrior Products 2960 Steel LED Tail Light Kit. This solved my clearance problems! The LED assemblies mount in rubber mounts that fit into the solid steel carriers. This assembly stands off from the sheet metal of the backside of the vehicle about an eighth of an inch less than the stock tail lights. It was enough! Now my RotoPax cans and their mounting hardware clear the tail lights with the tailgate door fully open. Sweet!
The 4" grommet mounted tail / brake / stop lamps are Truck Lite Super 44s, easily found at virtually any truck stop, and probably any of the better equipped RV supply or auto parts stores.
The 2" grommet mounted backup lamps are another story, unfortunately. I can't tell who makes them, and have thus far not been able to find something suitable on line to replace them with. They just don't throw that much light.
And yeah, this is the driver's side assembly. I got excited about images before the passenger side assembly was fully installed ...
![]()
17 March 2018
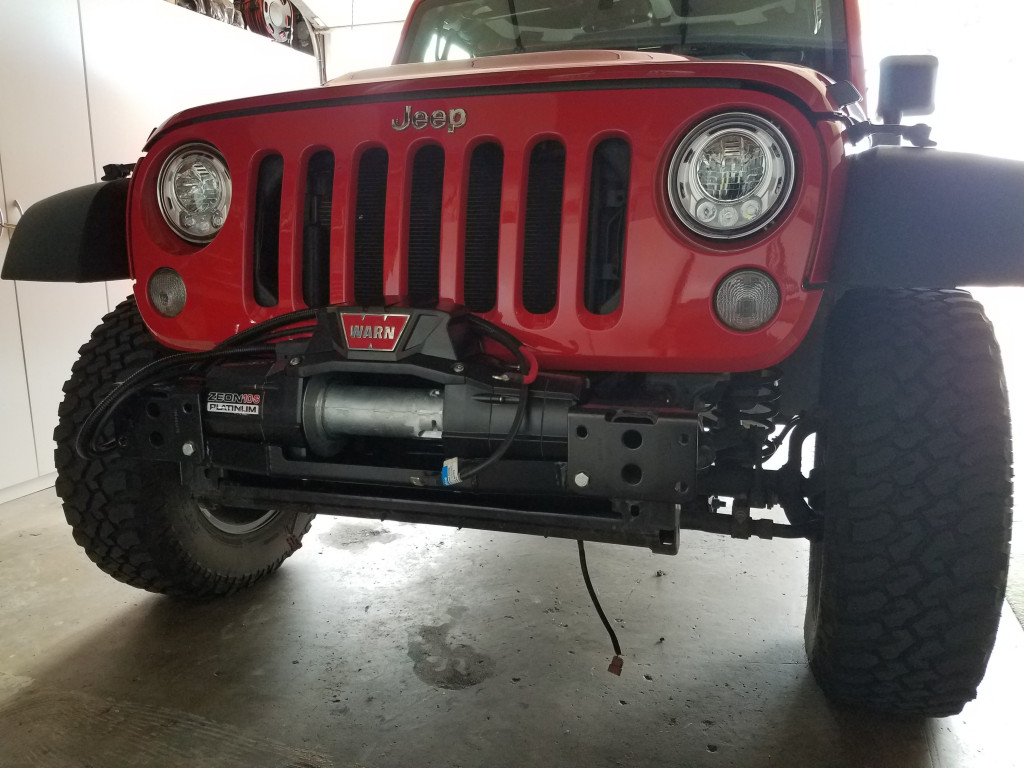
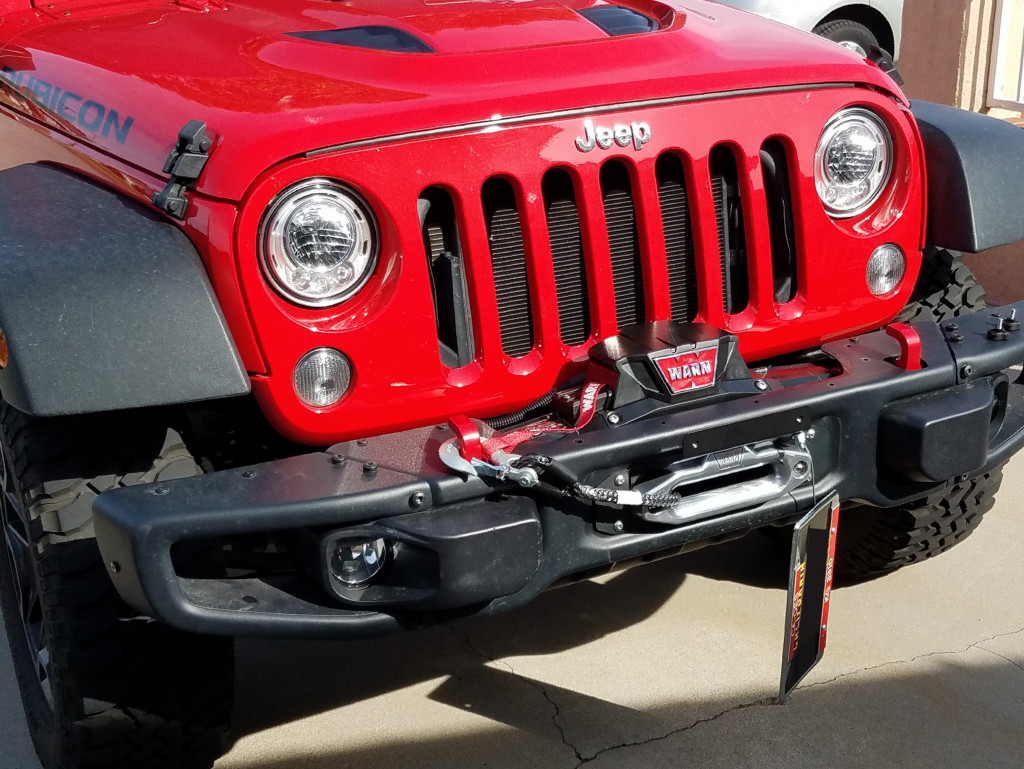
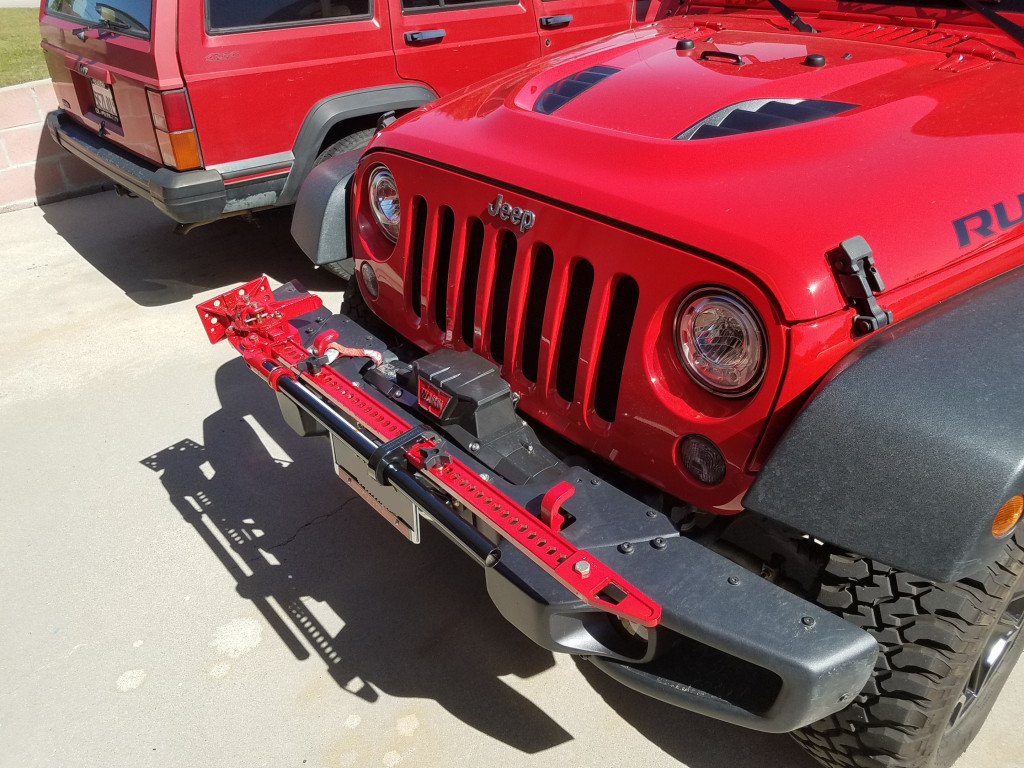
I wheel solo a lot, so I try to be ready for anything. To that end, I figured a good winch would be great insurance against long walks in the dark. Above we see me about halfway though the task of mounting a Warn Zeon 10S winch. I quickly figured out that the winch plate 4-Wheel Parts recommended wouldn't work for me, I instead chose a Maximus-3 HR1009WZ centering plate. The Maximus-3 product is specifically designed to center-mount this winch on the Rubicon Hard Rock bumper. It all fit like a glove. Once I got over that minor hurdle the rest was fairly easy, although it took me a little over a day to get the job completely finished, which included the installation of a Rock Hard 4X4 RH-4004 License Plate Mount. See the finished result below.
![]()
28 May 2019
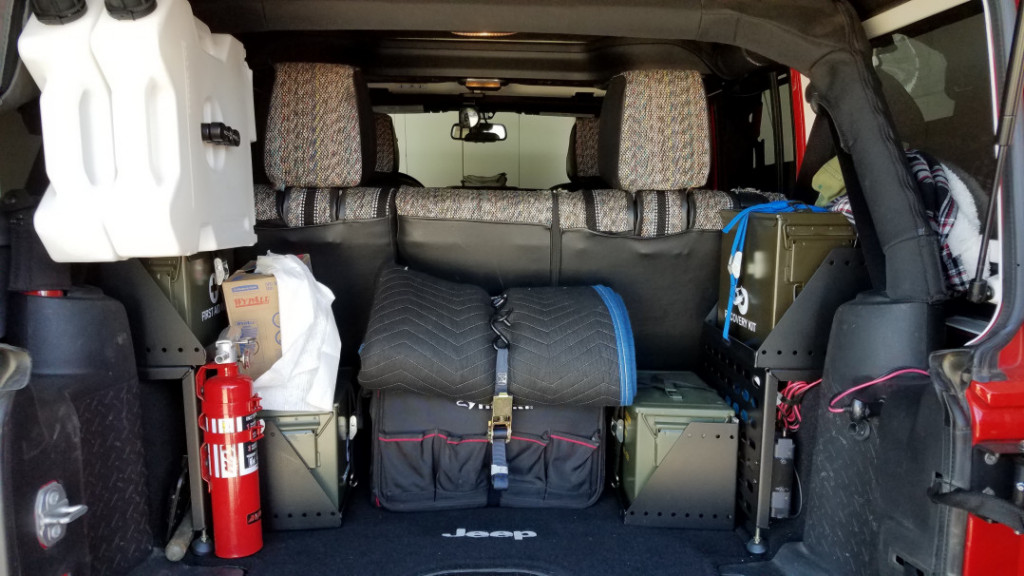
And now for some "little stuff" at the other end of the rig.
On the left side above we see a couple of white, 2-gallon RotoPax carriers for water. They are mounted on a Garvin # 66790 Interior Roll Bar RotoPax Can Mount for Hard Tops, which I bought from Extreme Terrain. With these I always have four gallons of water that is always with me, wherever I go.
There is an H3R Performance 2.5 pound MaxOut Dry Chemical Fire Extinguisher just below the RotoPax cans. It is bolted to the support for the upper of the two ammo can carriers on that side. These carriers are MorRyde products. The upper carrier is their part number JP54-030, the lower part is JP54-031. A duplicate configuration is on the right side of the cargo bay. I use the ammo cans for carrying first aid and recovery gear, and a few of the "just add water" type meals (made by Mountain House). It's enough to get BB and I through a few days in the rough, should that be necessary. The ammo cans came from an outfit called Ammo Can Man. I bought several different sizes for 50 caliber, including a few Fat-50s and a Tall-50.
The WypAll towels are always handy for cleaning up messes. I always have a box with me, they're much sturdier than the typical kitchen paper towels. In fact, in a pinch, you can rinse them out, dry them in the sun, and re-use them.
There is a large Husky tool bag secured to the floor between the ammo can carriers. Under that back seat is an Off Road Jack Base by Hi-Lift, their part number ORB. There is also a Hi-Lift Lift-Mate in the tool bag, Hi-Lift's part number LM-100.
Not very visible here are an old, foldable, small shovel and a 5.11 Tactical Operator Axe on the left, and ten feet of air hose on the right. Recently I added a Silky Saw Katanaboy 500 and a replacement blade to the left side. I'm told these are the kind for cutting firewood and clearing fallen trees from trails.
![]()
(The following section was expanded upon 3 September 2019.)
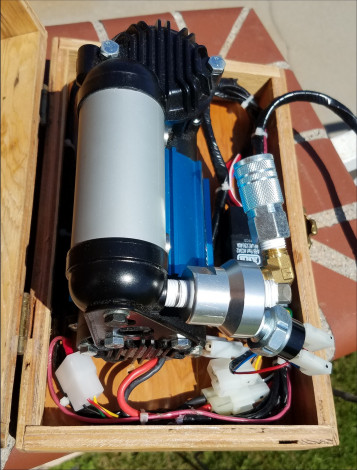
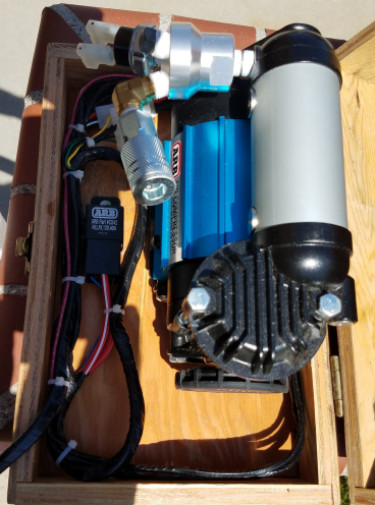
My cousin Monica, who partners with LRB's cousin LPB, was asking me some questions the other day that prompted me to add some information about the ARB air compressor mentioned below.
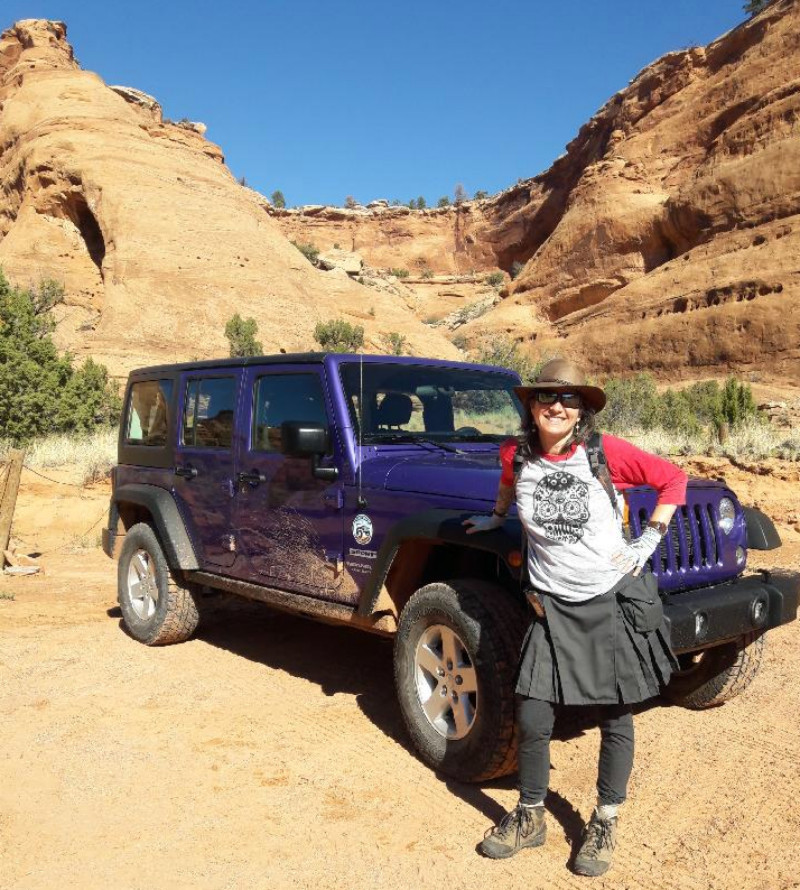
Monica and the LPB
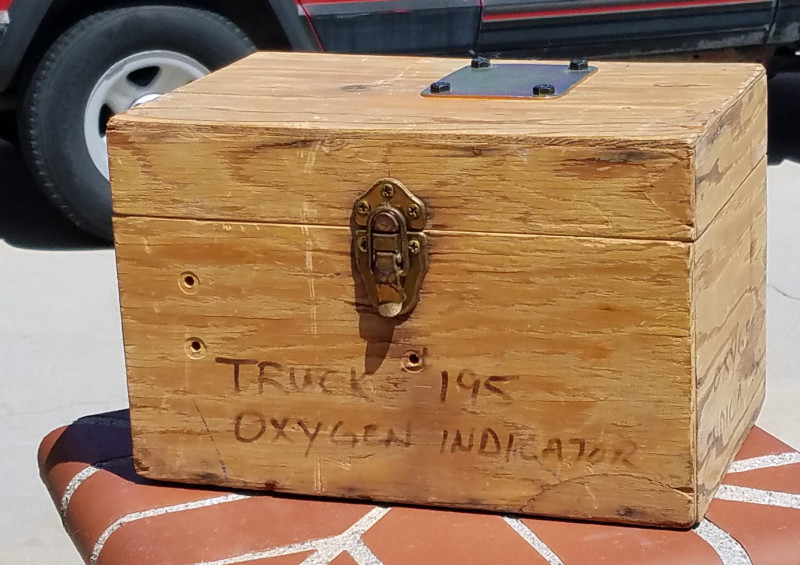
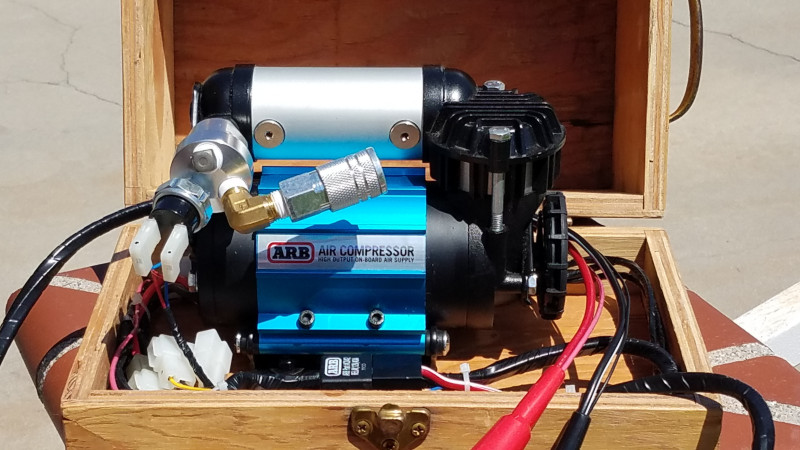
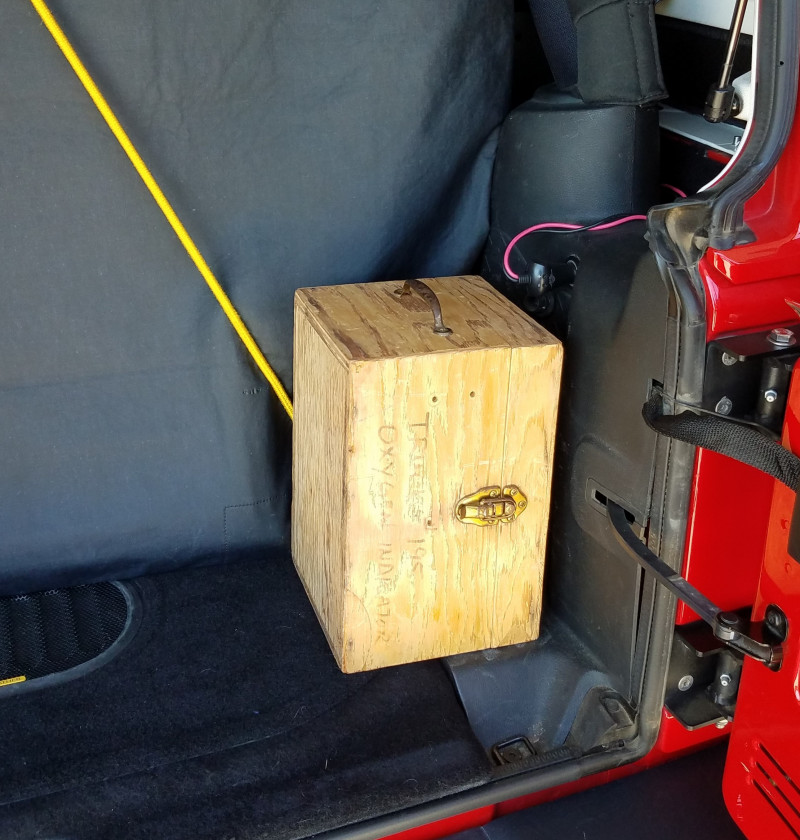
I have a small, portable ARB CKMA12 High Output Air Compressor that I bought from Extreme Terrain. It is designed to bolt onto the vehicle somewhere ... under the hood, between the frame rails, etc. I made some modifications to the wiring and did a little modification work to an old wooden box I had, and now have a fully portable air compressor that works perfectly with that air hose in the cargo bay to refill tires before I get back on-highway. It is nicely protected, so I have no qualms about throwing it in the back of the LRB and hitting the trail with it.
 |
 |
![]()
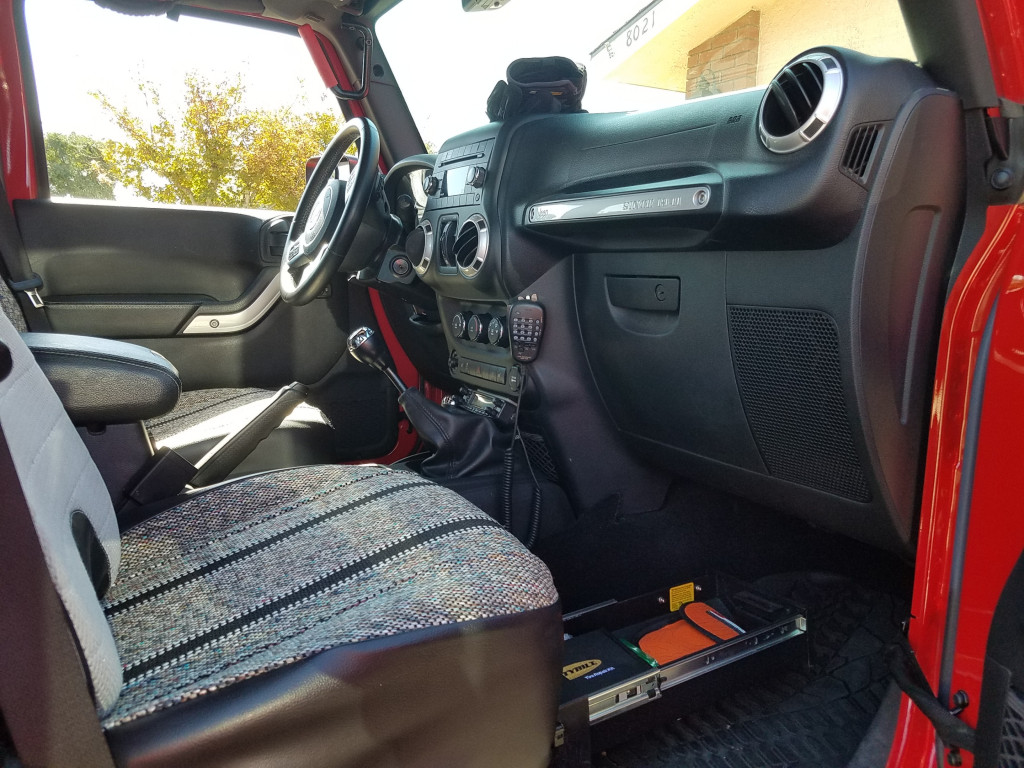
Some of you may have noticed the small electronic device hiding between the right ammo can carrier in the cargo bay and the wheel well. For you radio nerds, it's a Yaesu FT-8900R quad-band FM transceiver. I won't bore you all with specs or a description, suffice to say it's how I stay in touch with the outside world. The control head for this radio is nicely wedged between the gear selector and the bottom of the dash in my rig, and is visible above.
Also visible is the Tuffy Security Products 293 JK Conceal Passenger Side Security Drawer. It was a gift from Vicky the Christmas I took delivery of the LRB. I have alternate CCW methods, so I use this to carry tools related to tire maintenance and repair in it, along with some hardware for the Hi-Lift jack mount. Visible is the Smittybilt 2733 Tire Repair Kit and the ARB505 E-Z Deflator Kit (Brass). I got mine from 4 Wheel Parts in Santa Ana.
Finally, way up high above the steering wheel, one may see one of the GraBars Solid Grab Handle for the JK. I bought a pair of these, and they are awesome. 3/4 inch solid steel bar with a padded handle. What's not to like? I got them at RubiTrux. I later added a set for the rear seat occupants as well.
![]()
And finally there is the Hi-Lift jack. With those RotoPax gas cans hanging out in the back, I needed a place to mount this where it was convenient, but not a distraction. I've seen a lot of Jeeps with a Hi-Lift mounted on the hood. I guess I just don't want to see that, or hear it, bouncing around while I'm wheeling. So I got this instead, another Maximus-3 product from RubiTrux, a jack mount designed especially for the Hard Rock front bumper.
![]()
16 December 2018
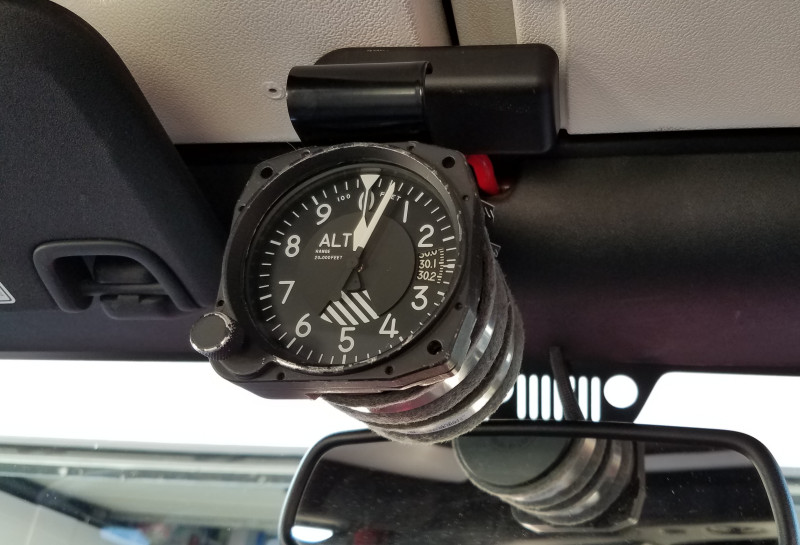
A little history. Altimeters have been a part of my four-wheeling experience since my father taught me to drive in his new '71 Jeep Wagoneer (yeah, I'm that old). Since then, every four wheel drive vehicle he owned has had an aircraft altimeter in it. (And he's owned a few since he put 250,000 miles on that old Wagoneer ... two Cherokees, an '88 and a '96, and an '04 Grand Cherokee. The '96 and '04 Jeeps are still in the family, still on the road.) So I figured that I needed to carry on the tradition, as I had been willed the two altimeters he had. Trouble was, the '17 Wrangler Rubicon doesn't have a lot of room in the panel or under the dash for something like that, so I had to get creative with things.
Above is my altimeter, mounted just below the footman above the rear view mirror. I used a Rugged Ridge 11503.95 CB Radio Mount Bracket, a couple of shiny new hose clamps, and some heavy duty felt pads to securely (and quietly) mount the altimeter where I can clearly see it. I got the mounting bracket from Extreme Terrain.
7 June 2019
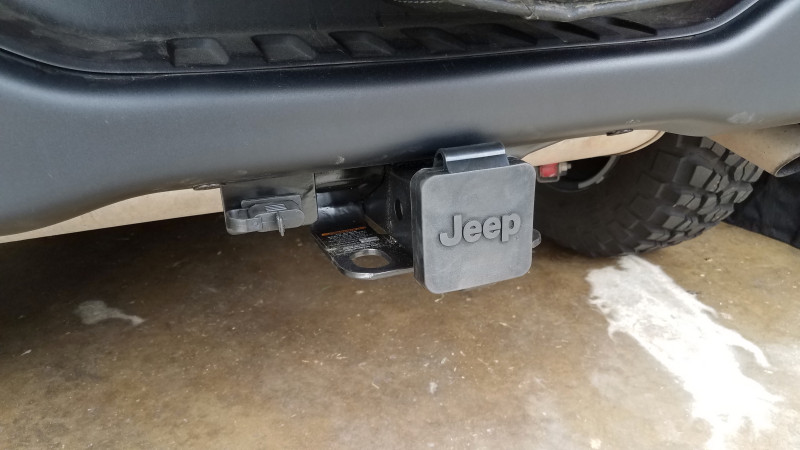
I plan to eventually get into overland camping, once I have retired and have the time to devote to such efforts. In preparation for that, I mounted this 2" Receiver Hitch with Wiring Kit from Quadratec to the rear bumper. The installation wasn't as seamless as the video implied, but a little time removing the welded-on nuts from the receiver allowed me to use the factory hardware the LRB came equipped with. A "Venderizer" made short work of that, and the included wiring kit made hooking up the 4-pole electrical connector to the vehicle electrical system literally a 15 minute job.
![]()
16 November 2019
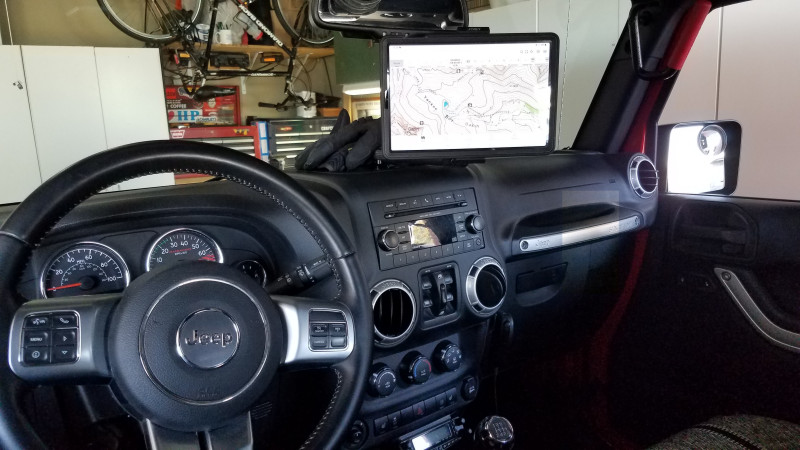
So my kids came to my rescue again, after listening to me grumble about what I had been using for mapping software on an iPad. Let me start by saying the Samsung Tab S5e was already in my possession. What makes that tablet cool is the hardware from 67 Designs and Joby that allows me to have it instantly available to me anywhere I go in the LRB. 67 Designs has a selection of JK-specific parts that allow one to mount any phone or tablet to a base in the "pocket" in the top center of the panel. I was given the single-ball JK Mount with the Universal Mount for a smart phone with the matte finish arm. While the universal mount for phones fit my Samsung Galaxy S7 just fine, I wanted to use the tablet, which was a wee bit too wide for the universal mount. Enter Joby with their Grip Tight Mount PRO Tablet. Mating this to the end of the 67 Designs arm also required a Camera Mount adapter from 67 Designs. It all bolted together in just a few minutes after I let the base mount adhesive cure in the panel pocket overnight. What you see above is the result. When I want to use it, my Tab S5e is right there where I can easily see it, but it does not restrict my view of the trail at all.
But that's only half the story. I had been using the free version of Back Country Navigator, along with plenty of desktop time at home with Google Earth and a quadrangle map viewer. Enter Gaia GPS, for which I was given a Premium 5-year subscription. Did I mention I love my kids? Tons of maps to choose from, including historical (1930) topos and recent (2016) National Forest Service maps. My two favorite things, quads and NFS maps! On a tablet! In my Jeep! In motion outside of any cell network connectivity! I'm livin'!
So now I am ready to navigate like a pro. OK, there's no tracking radar, but I've got superior mapping and navigating ability and radar weather data as well.
![]()
25 April 2020
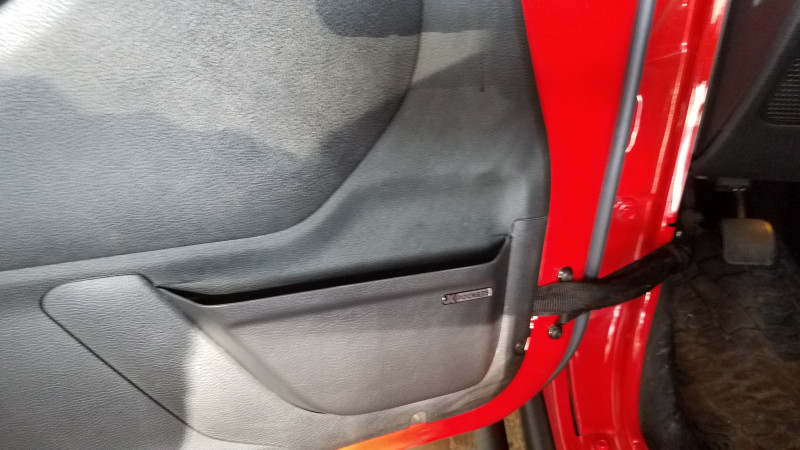
The JK series came with some storage pockets in the doors. They were made of some sort of fabric netting which stretched horribly over time, to the point where things stored in them would wind up getting slammed in the door frame because they hung so low. I replaced these stock storage pockets with JK Pockets from Slickrock Gear. These are made of a hard plastic material that roughly matches the inside door panels.
A word to the wise, while these look approximately the same size as the original net pockets, they will not hold as much. Particularly (much to BB's dismay), they will not hold an iPad comfortably or safely due to proximity to the door armrest, and it is not wide enough to comfortably store my holstered Beretta 92F. Also note that as I enter this data (30 June 2020), the Slickrock Gear web page seems to be down. They do have a presence on Facebook and Instagram, though.
Sorry about the focus problem with the image. It was taken in very low light.
![]()
30 June 2020
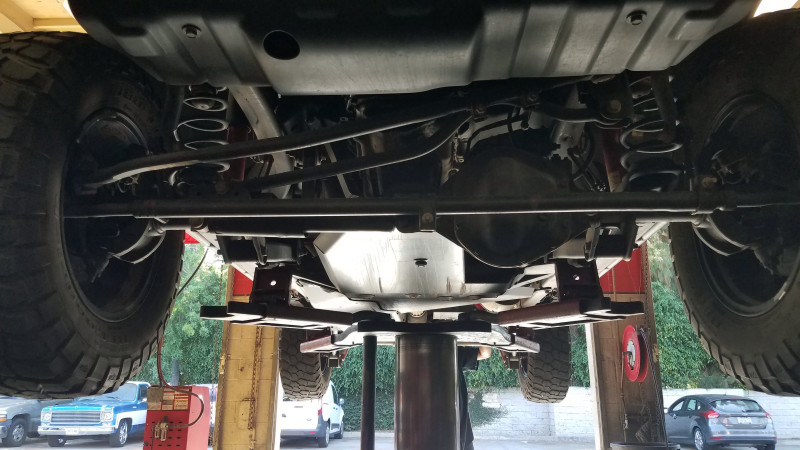
It's not often that I can look at the LRB's underside ("looking up her skirts," as my friend Brad might say), without bending over or getting on my knees or back. Here we see her displaying all her secrets while I maintain my comfortable respectability, so to speak. The occasion is the installation of a set of air bags from AirLift, their kit number 60817. The LRB is up on a hydraulic lift, and I am standing beneath the front bumper as we look aft. Looks like the rear of the engine skid plate has taken two or three light to moderate hits, right?
Cook's Tire and I had some fun with this installation. So far, this is the only thing I've added to my Jeep that I didn't install myself. Why? I simply had nothing at home that would allow me to lift the rear end of that Jeep high enough to get full expansion of the rear coil springs, which is required for installation of the bags and protectors. The instructions were kind of sketchy about routing of the air line to each bag, but by the end of the day Delfino and I had it squared away.
30 June 2020
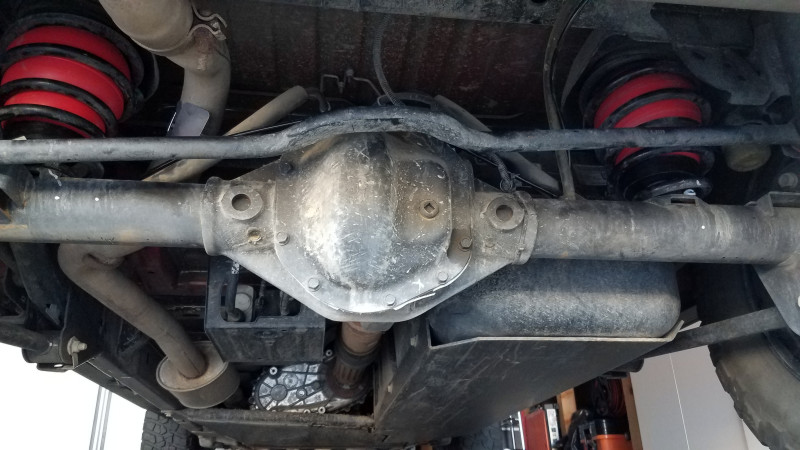
Here we see the finished product. Now I can tow up to 3,000 pounds with the LRB sitting pretty, not dragging ass.
![]()
Lift
Well, I was severely disappointed with the Air Lift air bags. Epic Fail after one mission of 750 highway miles. One of the air bags broke irreparably, rendering the entire system useless. I lived with the situation, leaving the equipment there until I had some reason to have the LRB up on a hoist again.
Well ... that day finally came. The air bags are gone.
8 June 2021, Troutdale, Oregon
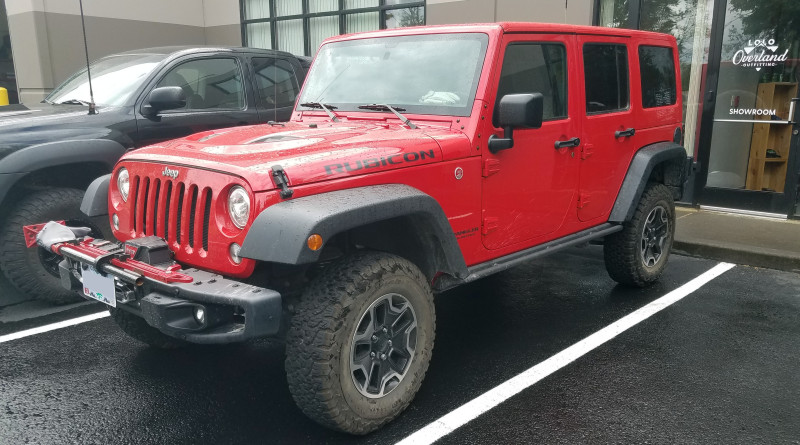
Not the best picture of the LRB, I know. Sitting on an asphalt pad in the middle of suburbia is not the right venue for any Jeep. But here it sits, freshly outshopped from LoLo Overland Outfitting after they installed an AEV Dual Sport 2.5" Lift Kit with the optional "Geometry Correction" Front Control Arm Drop Brackets. It is still sitting on the stock wheels (7.5" x 17") and tires (32" x 10" LT255/75R17 BFG KO2 All Terrains). Drew and Tony did a great job with the installation on a showery Tuesday morning. 600 miles round trip from home, but it was worth the trip. The 300 miles southbound felt better on the lift kit than the 300 northbound miles did on the factory suspension. I haven't used it off road yet, but will add future reflections or comments here as I do. What I will be doing a lot of in the near future is towing, so come back here for comments about that soon.
I originally heard about LoLo Overland from a fellow JK operator who spends a lot of time off-roading in a manner similar to my own. He sang praises of the AEV Dual Sport system after he had it installed on his JK, and has been overlanding with it extensively since then. Obviously I'm brand new to the lift, but his information and comments make me feel at ease with the $2140.00 I spent purchasing the kit and having it installed by LoLo. Check out Casey's YouTube channel, see for yourself.
![]()
Breathe Better
So after making several runs up and down California with a cargo trailer in tow, I started wondering about ways to make my engine work a little less while hauling the loads. I did a little research and found there are a lot of vendors in the aftermarket with whiz-bang induction systems for JKs. But I went with K&N. Why? I've used K&N equipment on another rig that hauled trailers around the country (all hail The Beast), and went with a known and trusted manufacturer. I don't think I was let down.
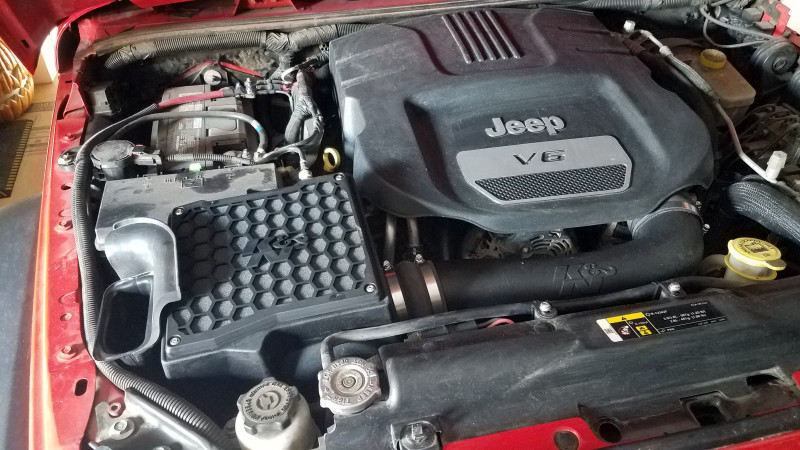
11 September 2021 - SCO Logistics shop, Talent, OR
This is K&N's part number 63-1581, their AIRcharger high-flow air intake kit. It is specially designed for the 2012 - 2018 Jeep Wrangler JK with the 3.6L V-6 engine. The kit comes complete with all parts and detailed instructions about how to remove your stock intake and replace it with this beefier replacement. It requires you to remove the oxygen sensor from the stock induction tube and install it in the aftermarket tube, but that wasn't a big deal. Just be careful ... that sensor is fragile, and even though it has a guard around it, it won't take much to break it. Then your couple of hours shade-tree mechanicals become a several days wait for that new sensor to be delivered.
All told I probably spent three hours with this, but I spent some time cleaning up other things that were revealed when I pulled the old air cleaner box out, and took my time test-fitting stuff before bolting it all together for real. I'm happy with how it turned out, and will be happy to report on any noticeable changes if anyone is interested.
![]()
On-board Air
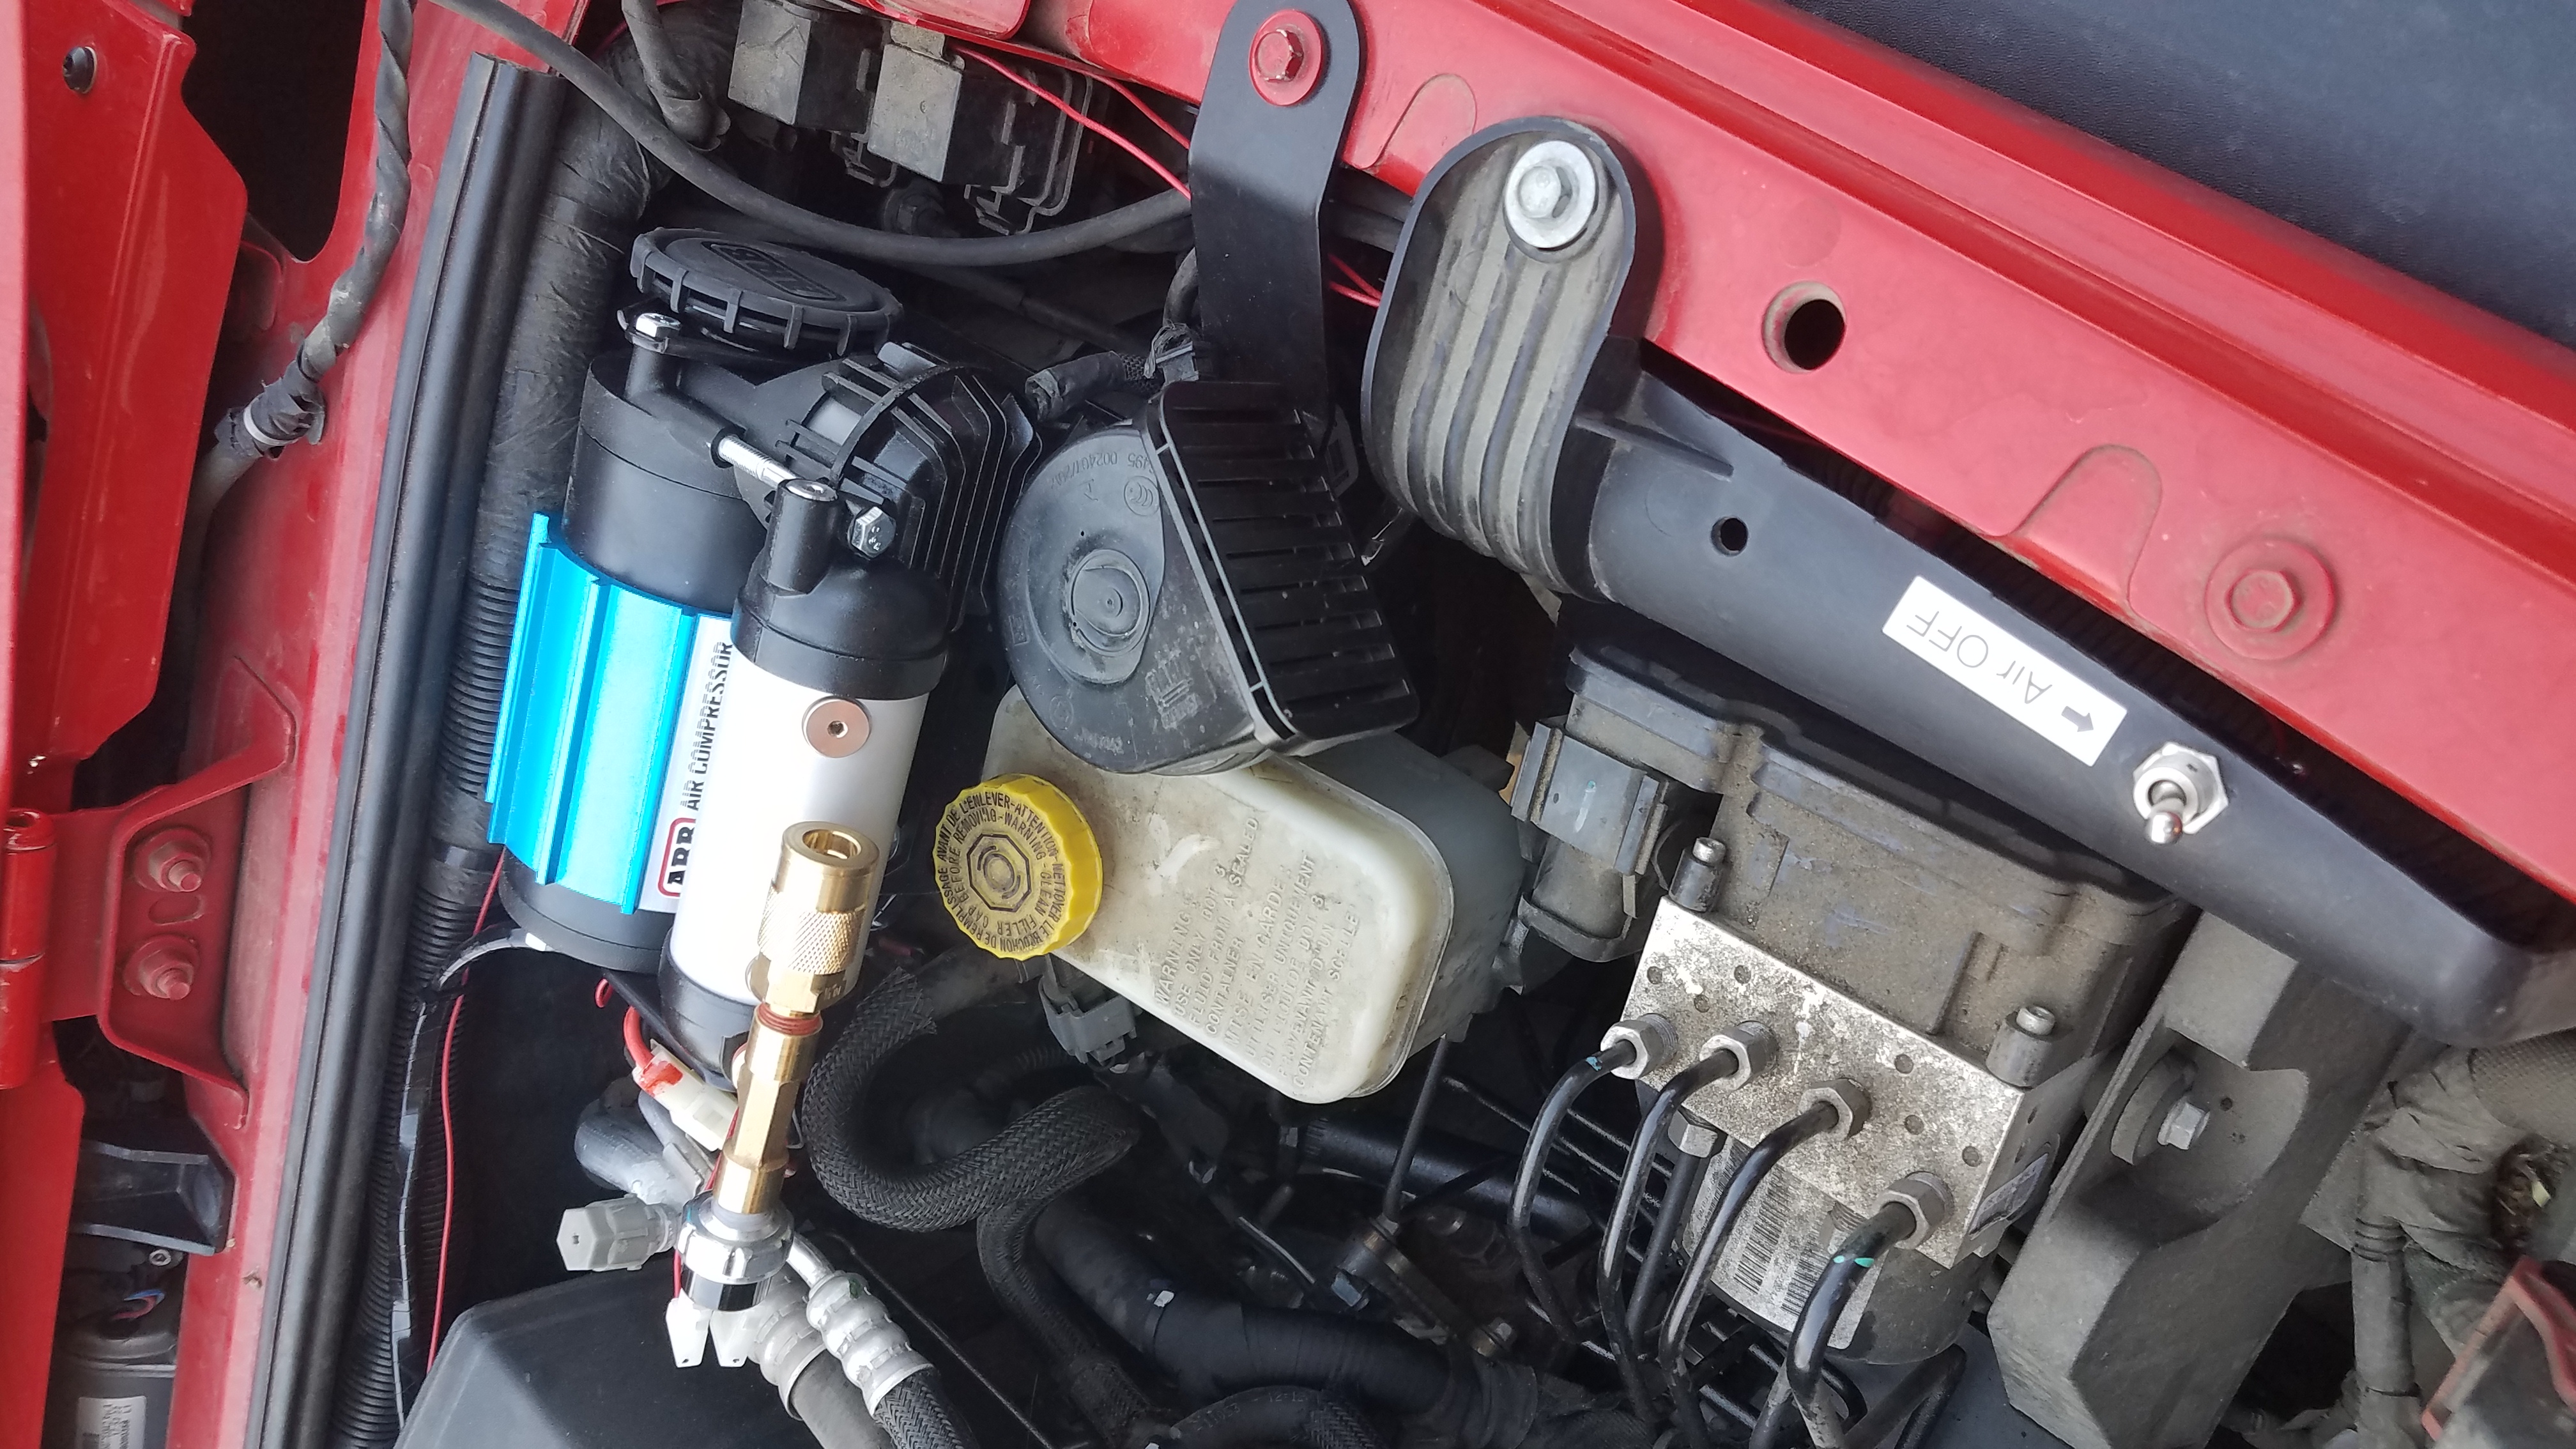
2 January 2022 - SCO Logistics Shop, Talent, OR
This is the on-board air compressor system I installed. It is the same ARB single-barrel air compressor I used to make the portable unit described above, the CKMA12, purchased from the same vendor. It is mounted on a bracket made by EVO Manufacturing, their model EVO-1097, expressly designed to mount this compressor on a 2012 - 2018 Jeep Wrangler JK. I seriously modified the factory cable harness for this compressor to eliminate all the extra connections for use with ARB air lockers, and wound up with the very simple arrangement shown in the below diagram. I was originally going to put the power switch for the system on the instrument panel somewhere, but the opted for the much easier location shown. The only time I need to power the air system is when I'm actually going to connect a hose to it, so I figured this would be an optimal location ... out of the way but very close to the equipment. The only additional parts I had to buy were the brass tee and hose coupler. I had the toggle switch in a parts box, it is a simple SPDT on-off switch.

One less box to carry in the back now. I will keep the portable compressor, and maybe use it in the next off-road rig we buy.
Auxiliary lighting
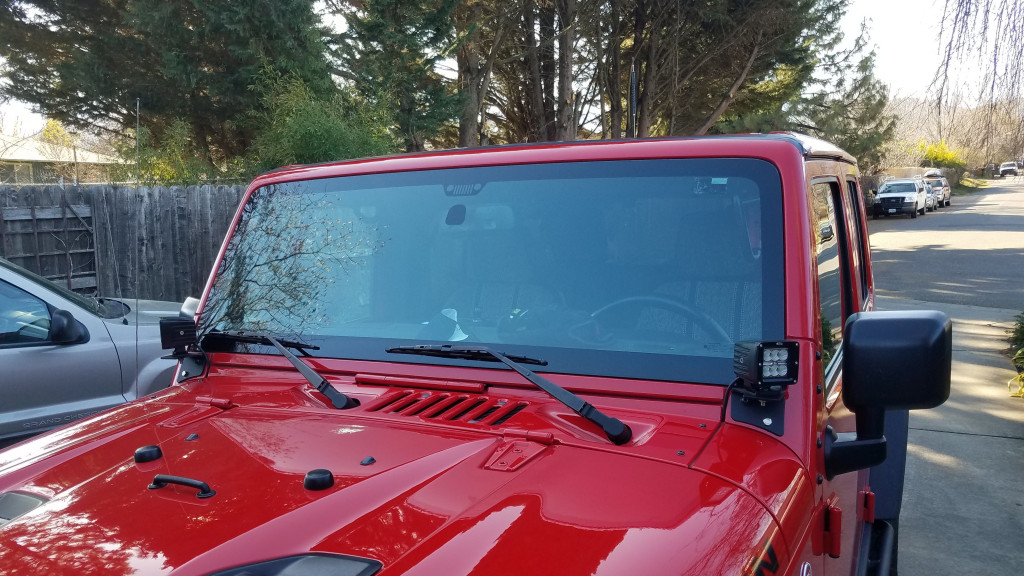
8 February 2022 - SCO Logistics Shop, Talent, OR
So I've been wanting to add some auxiliary lights so I can see what's going on outside of the relatively limited field of illumination the LED headlights in my Rubicon provide. Those headlights are way-cool for on-highway driving, but don't do much to illuminate things that aren't right in front of you when you're off highway.
I did a little shopping around and found these lights from Quadratec. They come as part of a kit you can buy that includes the mounting brackets, the lamps, and a full wiring harness with all the hardware you need to get them operational. The only concern I had was that if you use the stock bolts from your JK to hold the brackets in place, the ones that are at the lower level of the bracket will be pretty short. These brackets are pretty heavy duty steel, and have some thick rubber behind them to protect your finish, and with that extra thickness the stock bolts weren't quite long enough for a good, strong connection. Fortunately I had a couple of stainless steel bolts of a similar thread size that were a quarter inch longer, and that did the trick nicely. You can see them in the image, nice and shiny, whereas the other bolt in the bracket was original to the JK.
The lights themselves are 3 inches square, and each lights has six of the 5 watt Cree LEDs in them. You can buy them in either an 8 degree spot beam or a 90 degree flood light pattern. I got the floods. Each 60 watt light produces 2700 lumens of 6000K color temperature light and is sealed up (IP67 rating) in an aluminum housing with heat fins, illuminating the world through a polycarbonate lens.
The wiring was easily accomplished once I read the brief instruction sheet ... twice ... to make sure my assumptions were correct. The kit comes with a "plug-and-play adapter" that connects to the cigarette lighter wiring, allowing you a fairly simple wiring solution ... provided you can easily dig down into your dash far enough to get to that cable. I chose to ignore that part of the wiring and, using the switch that came with the kit, just wired it all up to the switch which I placed at a convenient spot on my panel. The harness comes with two fuse holders, one with a 30 amp fuse for the lights and another with a five amp fuse for the control relay. I had it all done, hole drilling (for the switch) and all, in a couple of hours.
And they are briiiiight!
![]()
Rhino Rack Backbone
Portland, Oregon, 6 May 2022.
The first step towards a solid roof rack system is the mounting points. This is a Rhino Rack Backbone for the JK series Jeep Wrangler, known officially as the Heavy Duty RCL Black 3-Bar Backbone, Part No: JC-01316. Dynamic (in motion) load rating 265 pounds, static (at rest) load rating 800 pounds. These crossbars bolt through the fiberglass top to the metallic structure of the vehicle, using hardware supplied. Here's the installation instructions. It's pretty robust. The installation was done cleanly and fairly quickly at LoLo Overland Outfitting in Troutdale.
I was originally intending to put a rooftop tent of some sort on these bars, but have re-thought that in favor of just using it for storage of various tools and equipment not normally needed in the cabin of the vehicle. I haven't yet finalized whether I want a basket or platform style rack, so this is part one of a two-part installation that is still in the design stages.
Thanks to our friends Jenn and Ron for putting us up (putting up with us?) while the LRB was being tended to.
![]()
Trailgater
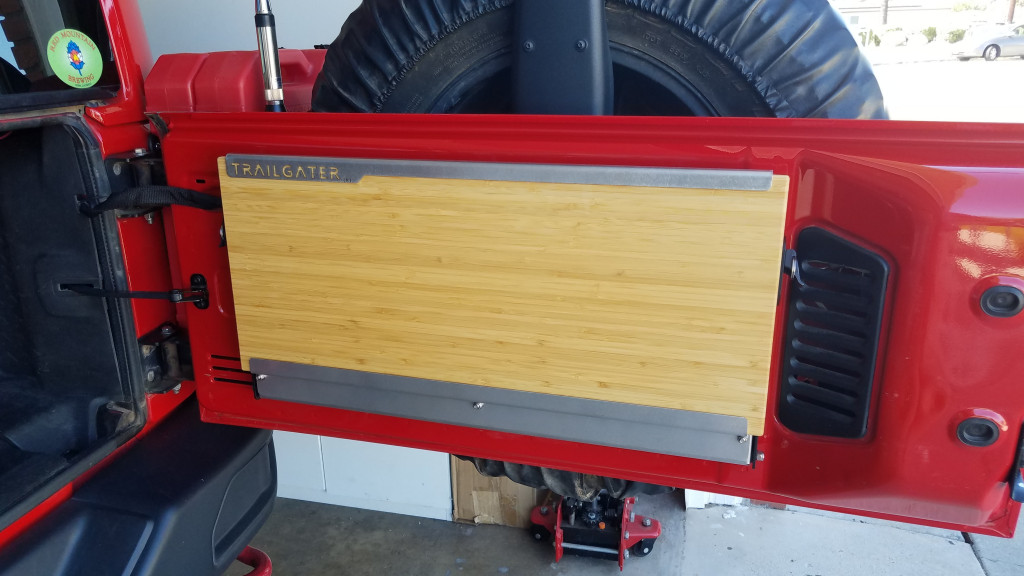
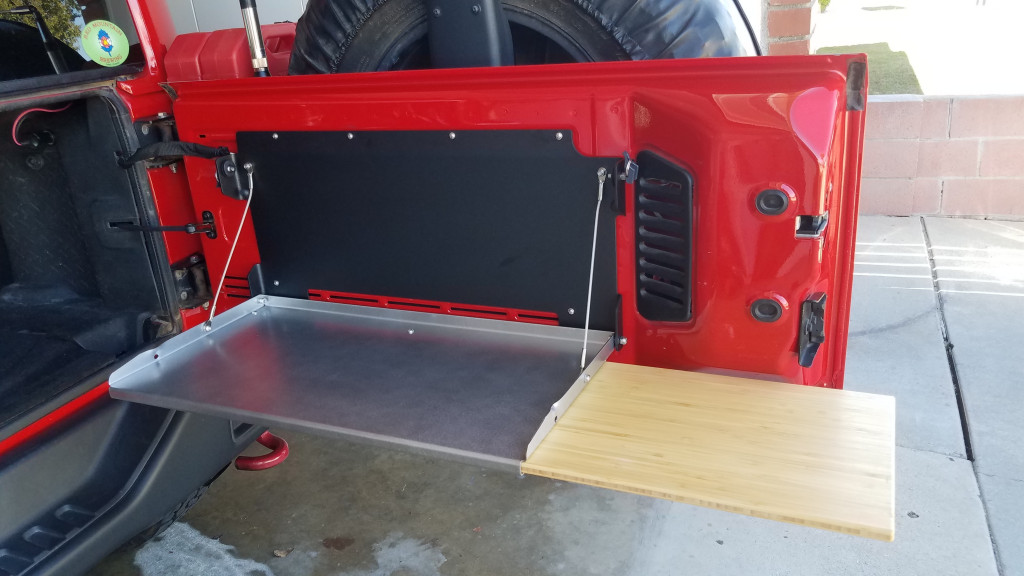
Both images 8 July 2022.
I bought this product from Trail Recon. You YouTube fans may recognize the channel name, Brad is well known in the off-road and overlanding circles. At his web site he's got all sorts of gear for people into off-road / overlanding, and that is where I found The Trailgater. These are made by Outback Adventures for the Jeep JK and JL, and more recently for the new Ford Bronco. The one shown here is the black painted version with the bamboo cutting board for the JK.
It makes a decent camp kitchen, but also a decent workbench. Load limit is 65 pounds, and the fit and finish is excellent. It feels really solid.
![]()
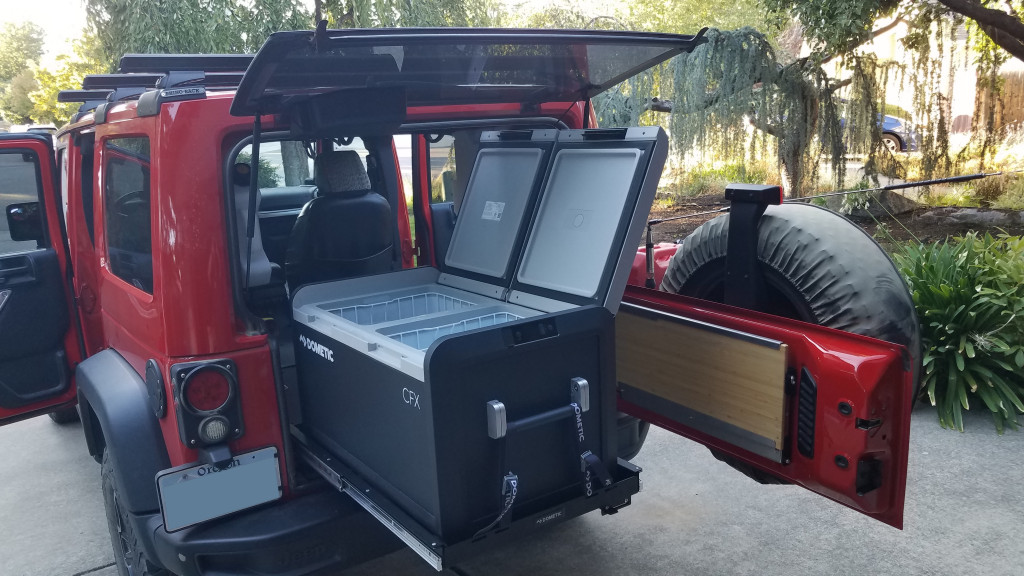
Refit for a Refrigerator / Freezer
So the bunny has, for a while now, been telling me what awesome meals we could be consuming on the trail if only we had a reliable way to transport frozen and refrigerated foods. Most of you know that I'm a big fan of consuming tasty meals, so you'll understand why it was only a matter of time before we undertook the installation of a Dometic CFX3-75DZ refrigerator / freezer in our rig. It's not as easy as it sounds ...
It might have fit behind the rear seat cross-ways, but we wanted to put it on a slide-out tray (the Dometic CFX3 SLD75, to be exact) that would allow us to slide the 'fridge out from the tailgate area ... and there is no way you can do that in a JKU with a cooler this big, unless you remove the rear seats. Are you seeing where this is going?
So I ordered up some products from Goose Gear. I saw their exhibit at the Overland Expo in Flagstaff in September of 2021, and liked what I saw. After taking some measurements and doing a little coyote engineering ("yeah, it oughtta fit, no problem"), I sat down at the computer and ordered up the following Goose Gear items:
The Stealth Sleep Package - SKU # 1139-GGR-WC.
There are four different versions of this package, depending on the year and sub-woofer presence / placement in your vehicle.
The Side Cubbies - SKU # 1027-GGR-WC
The Infill Panels - SKU # 2772-GGR-WC
Before we take a look at what all this stuff is and how it goes together, there are a couple of things you should know about Goose Gear. Bear in mind that some aspects of this information may be specific to the 2017 Jeep JK Unlimited.
First, Goose Gear is in Huntington Beach, California, but they do not sell to the general public from their manufacturing facility. Links at their web site will tell you where the Goose Gear distributor nearest to you is located. You must purchase through a distributor. The folks at Goose Gear are quite helpful on the phone with technical support, fitment information, and sales support, but they don't sell direct to the public.
Second, they build to order. It took me about ten weeks to get my gear delivered to my driveway. Factor that into your scheduling if you're planning a trip to immediately follow the installation of your gear.
Third, there are no written instructions in the boxes. There are some rudimentary instructions at their web site, but they also have a couple of videos (specifically for the Jeep JKU) that are way more informative than the written stuff. They are about the Side Cubbies Installation (must be done first) and the Rear Plate System, and were made in conjunction with 5.11 Tactical, who was doing a buildout on a JKU they had. These videos will help you install the plate and "cubbies," which fit behind the back seat in the Wrangler Unlimited. The "Stealth Sleep Package" I ordered also came with what they call the "Second Row Seat Delete Plate System," which when combined with the Rear Plate and Cubbies will give you a nice flat surface (with storage below) all the way from behind the front seats to the tailgate door. But ... there are no instructions that I could find anywhere at the Goose Gear site that describe how to install the Second Row Seat Delete System. The the appearance of the gear is fairly intuitive, but I found a video that helped clear some things up for me before I spent half a day doing it the wrong way first. Check out Dan with Backwoods Overland, he produced a video about installing the entire system.
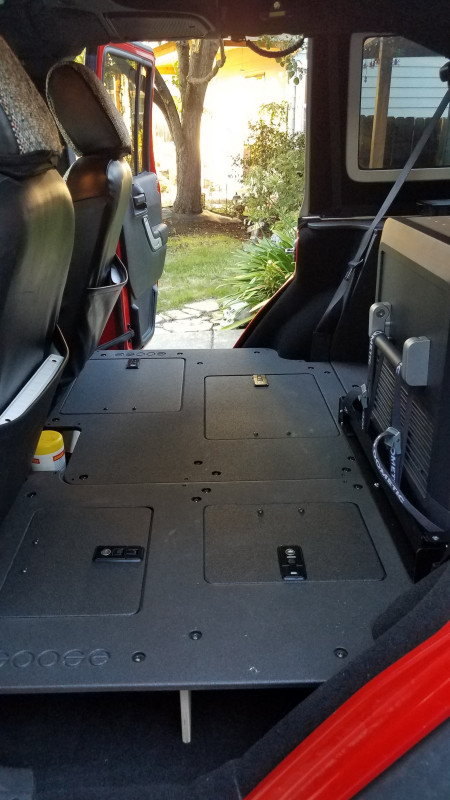
Before you start, you have to get everything out of the back of the Jeep. And take it from me, if your rig has as many trail miles on it as mine does, you'll work at getting some of those seat bolts out. Also be aware that you can separate the 40% seat from the 60% seat before you remove them. Makes handling them easier. Including all the gear I had in the Jeep, it took me several hours to get to the point where it looked like what you see below.
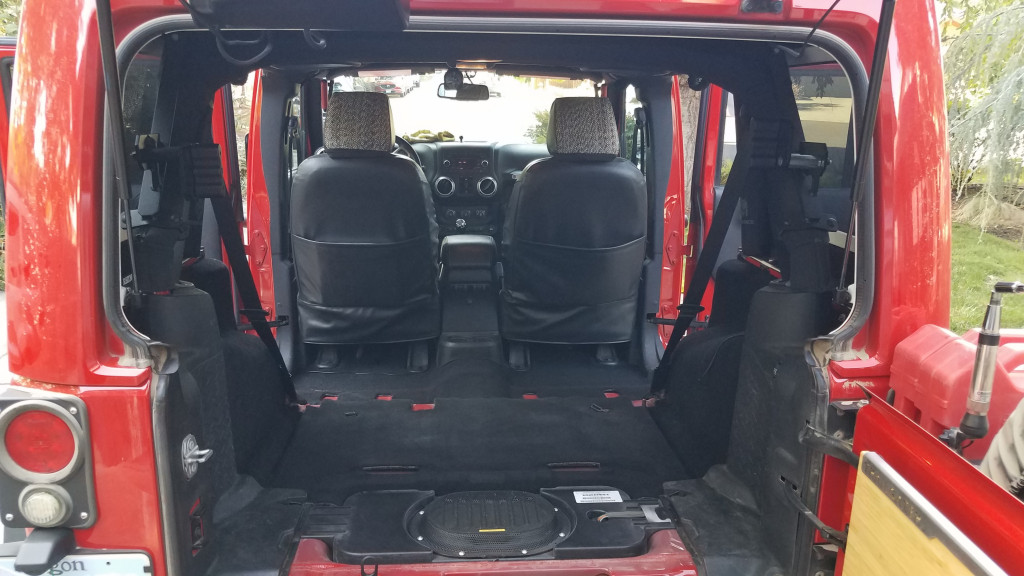
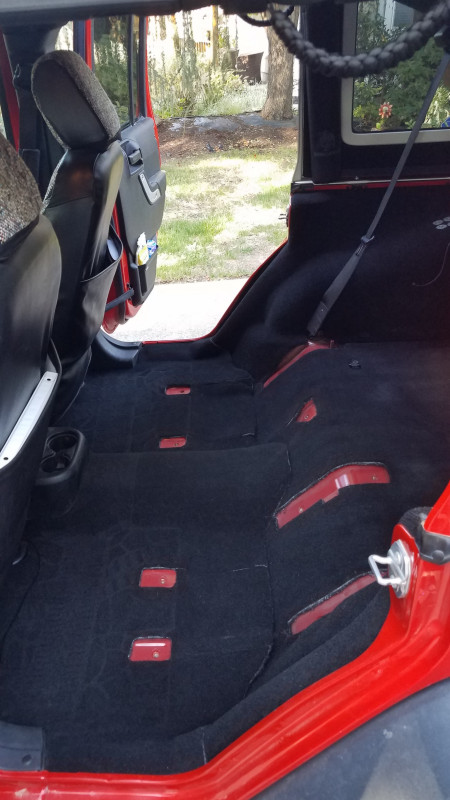 |
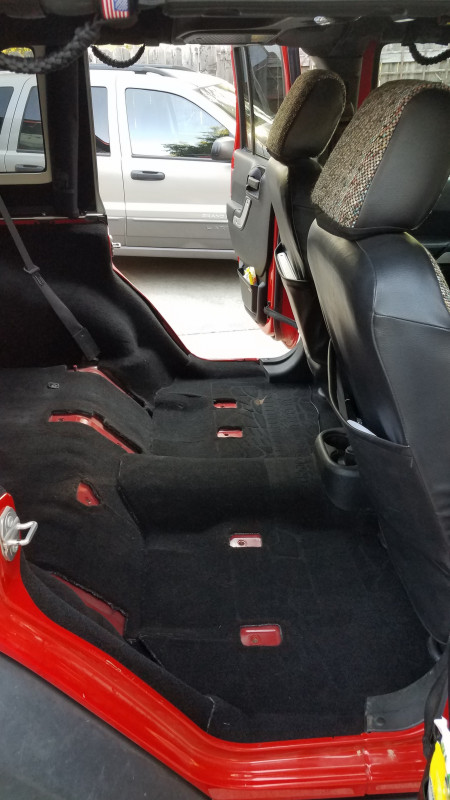 |
Three views above 12 October 2022
Next, referring to the videos as needed, get the Goose Gear installed. No drilling is required, everything mounts to existing points with hardware supplied, or in some cases using original hardware (forward seat mount points). On bolts threading through the floor to the outside, I applied some antisieze so I'd be able to remove them again. Re-install all original bolts at mount points that are not used in the Goose Gear installation (four "upper level" seat bolts, two tie down mounts furthest towards the rear of the vehicle, and the four bolts holding the base plate to the floor of the Jeep). Depending on your vehicle year, you may have to cut off three bolts hidden beneath the plastic trim panel where the tailgate door hinge attaches to the car body. A handheld cutting tool of the Dremel Moto-Tool type is sufficient. Ratcheting box wrenches will make some work much easier. Hopefully when you're done you'll have something that looks like this, below. It took me most of a day to get to this point.
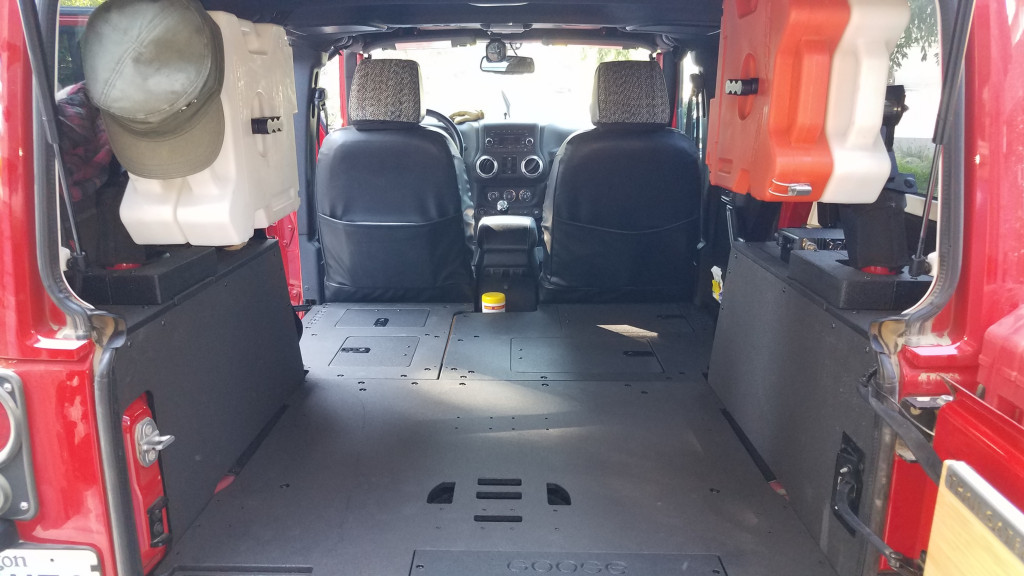
13 October 2022
Now that you have your flat deck to work on, it's time to install the slide tray for the cooler. It's tricky with something as big as the CFX 75DZ, but with a tiny bit of elevation (3/32" washers between the slide tray mounting points and the deck, providing just enough space to allow the jack storage compartment cover to be removed from the deck) and some very careful positioning, it can fit. Pay particular attention to clearance at the rear-most hatch on the starboard (passenger) side, and ensure the tray the cooler sits on can slide out without grazing or bumping the black guide bracket for the tailgate door on the left wall at the far rear, below the silver colored tailgate latch bracket. Square everything up between those two limits, and hopefully you'll end up with something that looks like this:
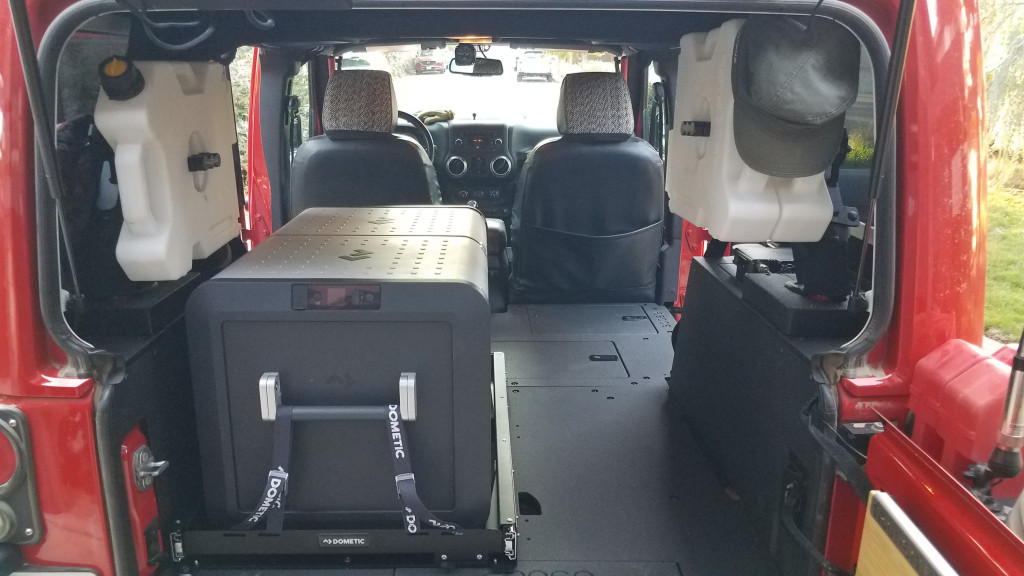
Above three images 14 October 2022
For this upgrade, all images at the SCO Logistics shop, Talent, OR.
It took me about three hours to get the cooler permanently installed. I still need to find some soft storage (bags, pouches) so I can efficiently store everything that used to be piled up in the back of my Jeep stowed safely below deck. Concurrent with that I will be installing a Goal Zero Yeti 1000 power system in the Jeep to keep the 'fridge / freezer running at all times. It'll charge when the engine is running, when I have solar panels connected to it, or when I plug it into a wall outlet.
So if you see us out on the trail, say hello. We'll be the well-fed looking couple with dusty clothes and happy smiles.
![]()
Up on the Roof Top
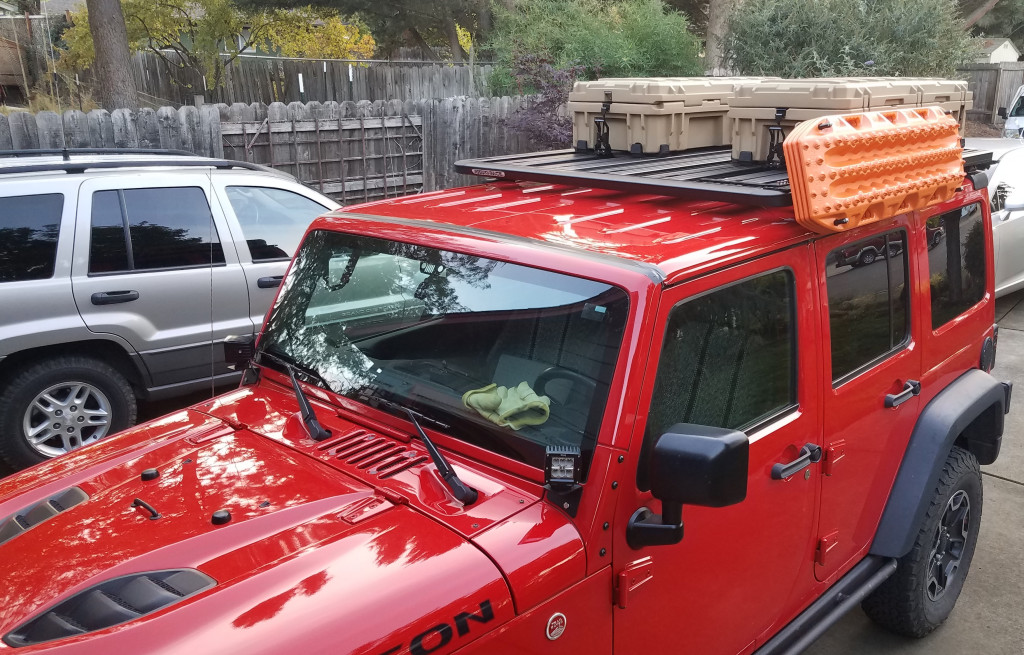
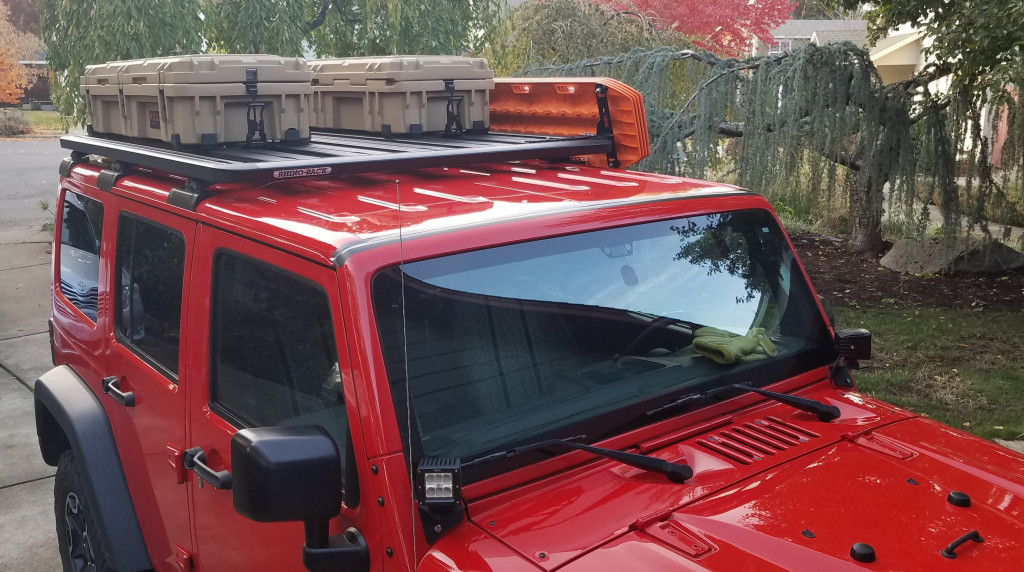
Both images 10 November 2022, SCO Logistics Shop, Talent, OR
So this one took a little time. But before we get into it, let me tell you what you're looking at. Here's the parts list:
Rhino Rack 72" x 56" Pioneer Platform (product # 52108F)
Rhino Rack RCL Locking Leg Kit (pack of six, product number RCL6)
Rhino Rack Pioneer Max Track 75 degree Bracket Kit (product # 43159)
Rhino Rack Max Track Support Brackets (product # 43197)
2X MaxTrax Mk.II Signature Recovery boards (making 4 total)
MaxTrax Mk.II Mounting Pins (17mm)
2X Roam Adventure 95L Rugged Case
2X Roam Adventure 95L Rugged Mount Kit
Those of you who have read through all of this little saga will remember that I had a pre-existing Rhino Rack Backbone mounting system on this Wrangler, described here. It basically provides three pairs of hard points on the roof of the vehicle to mount rack crossbars to. My Backbone kit came with heavy duty crossbars with heavy duty locking legs. If you had the same kit installed on your JK, you do not need to order the locking leg kit in the parts list above. You will already have the legs you need on the crossbars you have on your Jeep.
Building the platform was no big deal. It's pretty sturdy. Mounting it on the Backbone was a different story. You will need a helper to help you get the platform on and off the roof of your vehicle. Beware of the fitting information shown at Rhino Rack's "FitMyCar" link. This is a guide. (I'll save you the drill-down menus, here's the link to the information for the 2007-2018 4-door Wrangler JK). These numbers will get you in the ballpark, but you should not tighten anything having to do with the position of the three leg-equipped crossbars on the platform, nor the position of the feet on those crossbars. Leave all that hardware loose enough to move the crossbars and feet around with the platform on the vehicle. Proceed in this order once the platform is on the roof and positioned more or less as you want it.
First, position the crossbars on the platform so that the legs are near or on the the Backbone hard points (mounting surfaces). Ensure that the crossbars are square with the platform, or reasonably close.
Second, position the feet on each crossbar, and the crossbar position on the platform, such that the mounting hardware for each leg can be threaded into the corresponding Backbone hard point. Tighten this mounting hardware enough so that the legs cannot move easily on the hard points.
Third, with the legs secured to the hard points, position the platform so that it is centered left-to-right on the vehicle, and then position the platform front-to-rear to suit your taste. Re-check the left-right centering after you complete your front-to-back positioning. Once this is done, tighten the nuts holding the crossbars to the platform inboard of the mounting feet using an 8mm socket. The hardware should be tight enough to prevent the crossbars from moving front-to-back in the platform.
Fourth, double-check your left-to-right centering one last time, and then tighten the hardware that secures each foot to the crossbar using a 5mm hex key. The hardware should be tight enough that the feet cannot be bumped out of position when you remove the platform from the vehicle.
Fifth, remove the hardware holding the six legs to their hard points. Remove the platform from the vehicle, and place it upside down on a flat work area that allows you to move around the platform.
Sixth, tighten all accessible hardware securing the crossbars to the platform, using the torque-limiting tool supplied with the platform kit and an 8mm socket.
Seventh, carefully mark the position of each leg on each crossbar. After you have marked their positions, loosen (but do not remove) the hardware securing each leg, and slide it towards the center of the platform. This allows you access to the final hardware securing the crossbar to the platform. Tighten this hardware using the torque-limiting tool with an 8mm socket.
Eighth, return the legs to the positions you marked for them in the previous steps, and tighten them. The factory spec for tightening is 7-9 foot pounds.
At this point you should have all hardware on the platform tightened to specs. Return the platform to the roof of your vehicle and position over the hard points. If everything has gone well, you should be able to install and tighten the hardware holding the legs to the hardpoints. Factory torque spec for these 3-4 foot pounds. Install your lock covers on the legs, and congratulate yourself on a job well done!
Whew ... that was a bit of work, right?
The rest is easy, although I will say that the hardware supplied with my Roam Adventure 95L Rugged Mounts was not compatible with the Rhino Rack Pioneer Platform. No big deal, I have lots of 1/4-20 hardware in my shop, including nylon lock nuts, so the mounts were quickly secured. I put these mounts on the platform first, and then positioned the mounts for the MaxTrax boards to suit my taste. As you see it in the images, I have about 20 full-width inches of platform space in front of the Roam Rugged Mounts, space that can be used to store other stuff outside, instead of filling our interior spaces. I confess that I have not tried to remove the Freedom Panels from above the front seats of my Wrangler yet, but it looks like I should be able to do so. I'll just have to do it carefully to spare the paint on those panels. I'll report back next spring on how that goes ...
![]()
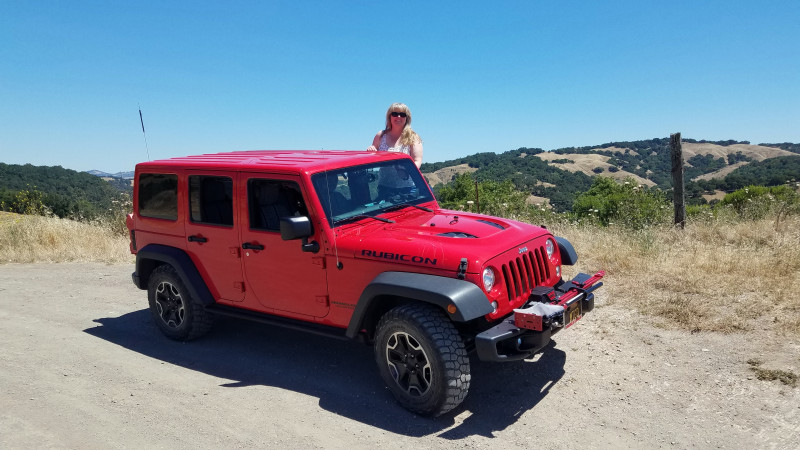
Two For The Road

Inyo Mountains, 14 April 2023
So I've done some work on the LRB that is not entirely visible in support of our new toy. The toy is an "overland trailer," a camper designed specifically for use off highway and off grid. It is a 2022 Patriot Campers X1-H. For the purposes of this conversation we'll say that it is a fully equipped RV trailer except for the fact that it has no on-board commode. It is basically a six foot square aluminum box on a twelve foot steel frame with an empty weight of 2200 pounds and a max vehicle weight of 3520 pounds. It has electronic trailer brakes and a RedArc managed internal power system. With 40 gallons of water on board it is fully capable of being completely off grid for extended periods of time. Perfect for us ...
Needless to say there was some work that needed to be done to the LRB in support of towing this thing around the west. That work can be broken down to the following steps, for each of which I have provided a brief description of the work done with associated parts required:
Air bag suspension
Yep, we tried this again, but this time I took the LRB to a shop that had a "jeep guy" on the payroll. Ten minutes chatting with this guy convinced me that he had been knocking rocks and chasing trails most of his adult life, and after watching him do the work I was even more convinced. Bottom line: since the LRB runs with the AEV Dual Sport 2.5" Lift Kit, the AirLift kit for the stock Jeep JK suspension was unsuitable. What we wound up installing was AirLift's kit for a half-ton Dodge Pickup, which also has coil springs, AirLift part number 60828HD. These things worked like a champ on our shakedown to the Inyos. I run about 10 pounds in them when we are not towing, about 30 when we are. Their presence makes the unladen ride feel a wee bit stiffer on highway, but so far I have not noticed any difference in handling on the highway or on the trail. Shoutout to Bob at Advantage Tire, Inc. in north Medford. Great installation, and he didn't mind having a couple of fellow Jeep nuts hanging around while he worked.
Tailgate Reinforcement and Tire Carrier Upgrade
We plan to shortly be upgrading tires from our current LT255 series BFG KO2s to the LT285 series of the same tire, which is the same size tire our trailer runs. I needed to beef up the structural integrity of our tailgate door, and also install a tire carrier that could run larger wheel and tire combinations. As we are already running MorRyde JP54-003 Tailgate Hinge Kit on the LRB, I went straight back to those guys and purchased the following:
MorRyde JP54-016 Tailgate Reinforcement
MorRyde JP54-017 Spare Tire Carrier
The tire carrier is adjustable and includes an extender piece to mount the high center brake light above your larger spare. You may note that I run a couple of RotoPax 2-gallon fuel packs on my tailgate door. The bracket for this mount may need to be moved outboard some when we mount the new LT285 series tires, stay tuned for detail on that when it happens.
7-pole Trailer Tow Wiring Harness
Just what it says, this is the factory harness that you get if you order your rig with the built-in trailer towing package. As mine did not come with that, I've been having to add this stuff myself. I ordered my kit on line, and was able to pick it up in Susanville, CA as we drove through on our way home from Salt Lake City. Big shoutout to the guys at Susanville CDJR for making that happen. Those guys sure made a big job more manageable. Make sure you get the version specified (82210214AC). This harness has gone through a couple of revisions, and as of this date (April 2023), this is the latest and greatest. Installation took some thinking about placement, and I needed to extend the wire for the connection to the electronic trailer brake controller (see below), but all in all it was pretty straightforward. Everything I needed (except some patience) was included.
RedArc Trailer Brake Controller
I purchased mine on Amazon. Make sure you get the latest version (as of April 2023), the
EBRH-ACCV3-NA for North America. This is an intelligent controller with lots of capability in a very small package. It comes with a tiny control head that easily fit on my dash next to the switches for my lockers and sway bar disconnect. It's not easily viewed while driving, but once you (literally) dial it in, you can ignore it. The "brains" are in a module that fit perfectly on the metal panel beneath the plastic panel below the steering wheel. All wiring and connectors necessary were provided, and system calibration is automatic. I spent more time figuring out where to put the control head than I did actually installing it.
30 Amp Power Feed to the Trailer
The Patriot Camper Series comes with two electrical connections to the vehicle. One is the industry standard 7-pole connection for trailer lights and brakes, and the other is a 30 amp charging circuit from the tow vehicle's charging system to the storage batteries (2 x 135 amp AGM batteries) on board the trailer. This required the construction of a switched charging circuit, so that the circuit was physically disconnected from the vehicle's electrical system whenever the motor was not running. To complicate matters slightly, the trailer connection is specialized one. Here's the pertinent parts:
Bussman ATM Mini Circuit Converter (Amazon)
irhapsody 120A 12VDC relay (Amazon)
Powerwerx 6AWG red/black cable
Trailer Vision 50A Quick Connector Protective Cover
The Circuit Converter and Relay provide a switch connecting the AWG 6 cable to the vehicle's charging system when the engine is running. The Protective Cover is mounted on the bottom of the rear bumper, opposite the 7-pole trailer connector. The protective cover holds an Anderson Powerpole SB50 Connector Body using the SB50/PP75 Series pins for AWG 6 cable. If you do not already have one, you will need Anderson's crimp tool for these pins. The hardest part of the job is pulling the cable from the engine compartment to the bumper.
That pretty much sums up the work I had to do to get the LRB capable of safely towing the X1-H. I also bought an extended ball mount to facilitate ease of opening our tailgate door while the trailer was hitched to the LRB.
![]()
Solar Power

Installation of a 100 watt solar panel, 7 May 2025, SCO Logistics Shop, Talent, OR
As it happens, the LRB is getting a lot of driveway time these days. Projects at home are keeping us grounded this spring, but I'm managing to get some projects on both the LRB and his little sister, "Bonnie Blue," knocked off my to-do list. Appropriate do this discussion, I need to give you some background. Let's start by back-tracking to discuss the power systems in the LRB.
When we started our little off-road adventure, we were using a Goal Zero product called a Yeti-1000 to power the Dometic CFX-75DZ refrigerator / freezer in the LRB (see the entry "Refit for a Refrigerator / Freezer"). It worked, most of the time. The jury-rigged charging system (using a factory cable designed for the task) gave us fits. It blew 20A fuses in the cigarette lighter circuit daily. But worse, the Yeti-1000 would not provide a constant DC voltage as the battery charge decreased. I don't know how it's built, but it acts like the voltage at the DC port is coming directly from the battery, not a battery manager or DC-DC converter. I know this because the CFX3-75DZ displays the DC voltage that is applied to it, and with the Yeti we were seeing problems with the 75DZ holding temperature start when the input voltage drifted below 11.7 volts or so. And at that type of voltage the Yeti still showed a charge state better than 60%.
There is no specification I can find for the accuracy of the 12V output of the Yeti-1000 (like +/- a percentage of the voltage or a specified range like 11.5V to 14.0V). Likewise I can find no specified input voltage range for the Dometic CFX3-75DZ. So what we needed was some power system that would deliver a reasonably consistent 12V to connected devices, regardless of the battery voltage or charge state (within reasonable limits).
We decided on a Total Vehicle Management System for the LRB, built by RedArc in Australia. They have several types, we chose the TVMS Prime Redvision System. We chose this mostly because our overland trailer has a similar system installed in it, and we have been very impressed with its capabilities. The batteries we chose to use with this equipment are Lithium Iron Phosphate (LiFePO4) batteries, manufactured by Battle Born Batteries in Reno, Nevada. We selected two of their 12V, 100Ah deep cycle batteries, and have been impressed with their operation and reliability.
I built the RedArc system for the LRB, but did not dive into it's construction or installation here. Suffice to say it works well, but we had some "growing pains" with the RedArc system charging from the vehicle charging system. After I read up on the configuration of the RedArc, I noticed that it was configured to draw 30 amps from the vehicle system. In actuality it was more like 35 amps, and that was too much for the initial wiring I did under the hood. Re-adjusting the current demand by the RedArc to 20A and building out a better power distribution system under the hood corrected all our problems. If you're interested in how all that went down, I can add some detail and images here. You can drop me a line or post something to the LRB forum.
The RedArc can be charged by shore power (115VAC ... "wall current"), 12VDC from the vehicle charging system, or from solar panels. So this project was about adding a solar panel in a rather small space, only 19" x 56", on the forward end of the roof rack on the LRB. I went searching on line for a panel, of any power rating, that would fit an area that small. I figured I'd be limited to about 50W of power generation with that footprint, and spent some considerable keyboard time until ...
Enter the Rich Solar MEGA 100 Watt Slim Monocrystalline Solar Panel. Sold by Off Grid Stores in Las Vegas, Nevada, you can also buy them direct from Rich Solar's warehouse in Norco, California or at their website. You might also want to pick up a box of 4 mounting brackets and hardware. Installation was a snap on the Pioneer Platform on the LRB. Almost like the panel and brackets were made to fit it! The only other thing I had to buy was a set of the MC4 connectors from RedArc, to work with the connectors the panel came with. That and some PowerWerx 12 gauge wire, and a couple of Anderson Powerpole connector bodies and pins, and ¡WOOF!
Done.
No flat-mounted solar panel is going to produce rated power because it's not optimally placed for maximum exposure to sunlight. Even so, mounted as you see it, this one was producing about 65 watts (a bit over 5 amps at 12 volts) of power in afternoon sunlight on a clear day. And that is plenty to keep the batteries in the LRBs RedArc system topped up while it's sitting patiently in the driveway, waiting for La Conejita and I to stop all this house related foolishness and get back on the trail.
I should pay attention.
I'm sure there's more things I can't live without that I just haven't seen on someone else's rig yet, or thought of myself.
Coming up sooner than later will be another set of tires (I'm on my third set, closing in on 115,000 miles ... yep, we off road some!). Now that the LRB sits a little straighter, I was thinking of getting some BFG KO2s, or maybe the KM2, in 285/75R17. My current KO2s are 255/75R17, which are 32.1" by 10". The new ones would be 33.9" x 11.5". I'm not sure if I'll need new wheels to provide any additional offset or not, but I think I will not. I'll seek professional advice on that, and when the new tires are on I'll let you know how all that turned out. One thing I already know ... ka-ching! They ain't cheap!
I've been thinking about replacing the stock driveshafts with something a little stronger and more reliable for towing, too.
As I get these things done I'll put up the detail here.
Until then, see you on the trail!
Post comments at the LRB Forum at PF!